
Overview
The SCAPE Live Reports provide a number of live report templates which make it easy for users to create a report about activities based on variables such as:
-
Campaign
-
Time period
-
Other fields available in your workflows
The Live Reports feature provides Workspace Administrators and Reporting Specialists with a set of features that can be used to create and manage reporting. Reports can provide a real-time picture of all contact centre activities.
Live reporting has a date range restriction to ensure no performance issues are experienced.
The maximum allowance of data to be pulled is 3 months.
1. Create a new page
A report page is a tab used to position all the reports you wish to view together. Think of a corkboard on the wall to which you attach all the photos, memos, letters, and invites that you wish to have quick access to view. Similarly, a report page allows you to create, and pin, all the reports you want to regularly view. Each report page is the equivalent of one corkboard and a user can create as many report pages as needed, renaming each one to explain their individual purpose.
-
Navigate to Live Reports from the sidebar in the Administrator Dashboard
-
Click the Pages button in the top right
-
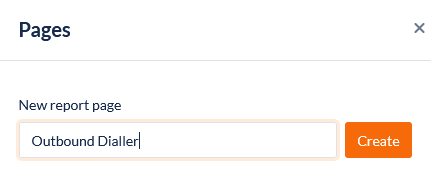
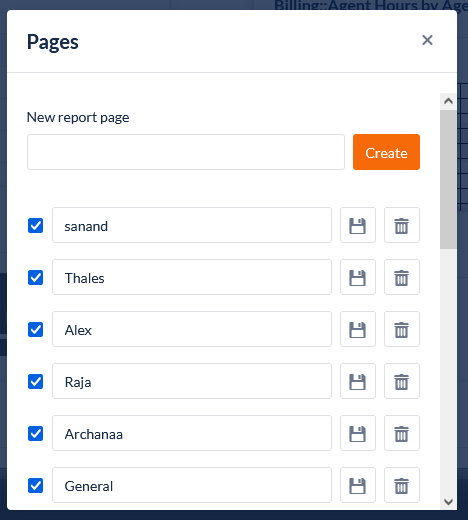
The Pages dialog box opens, listing all the Report Pages available. If this is your first time in Live Reports, an initial page named Change Me will display
-
To create a new Page, under New report page enter a title for the Page and click Create
Actions
|
Action Item |
Function |
|
|
Click on the checkbox next to its title to cause the page to be displayed. |

|
To delete any page, click on the Delete icon next to its name. Once deleted, pages cannot be retrieved |
|
|
To save or rename a page, click on the Save icon next to its name. |
|
|
To close the Pages dialog, click on the Close icon. |
Hide or Display a Report Page
This feature allows a user to control which report pages are displayed and which are not.
-
Select Pages from the Live Reports Module
-
The Pages dialog opens, listing all the Report Pages available
-
Those report pages that are currently visible have a blue tick in the check box beside their name.
-
Those report pages that are hidden have no tick in the check box beside their name.
-
Use the checkboxes to control which report pages you wish to be displayed.
Each displayed report page can be located in the tabs in the Reports Module. -
Click the Close icon in the header to close the window.
2. Add a Report to your Report Page
This feature allows a user to generate a new report from an existing template and position it on a report page.
Select Reports from the Live Reports Module. The Reports dialog opens.
Reports Tab
This tab contains a list of user-created reports, pre-configured report templates, and shared reports.
-
Contact Centre Templates are presented in grey text and are not editable but you can select the report and make a copy which then becomes editable
-
Personal Templates are presented in black text and can be edited and deleted.
Actions:
|
Icon |
Description |
|
|
Preview report - see how the report looks. This is the only option available for system templates. If you would like to use a system template close the preview select the template and press the copy button at the top of the of the list |
|
|
Edit report - modify the fields, filters and settings (see report settings sections below) |
|
|
Put report on the page - add the report to the selected page |
Create Tab
This feature enables you to create your own report, if none of the provided report templates meet your needs.
Edit Tab
This feature enables you to edit a report's settings.
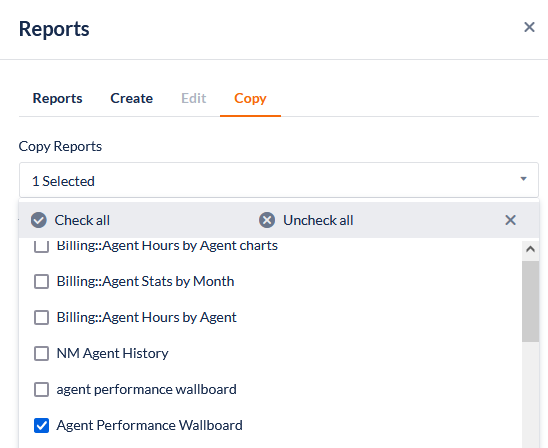
Copy Tab
This feature enables you to make any report you have cloned or created available to a colleague using the Copy feature.
-
To copy a report, select the reports you would like to copy by clicking the checkboxes next to the report(s).
-
Select the users you would like to share the report(s) with by clicking the checkboxes
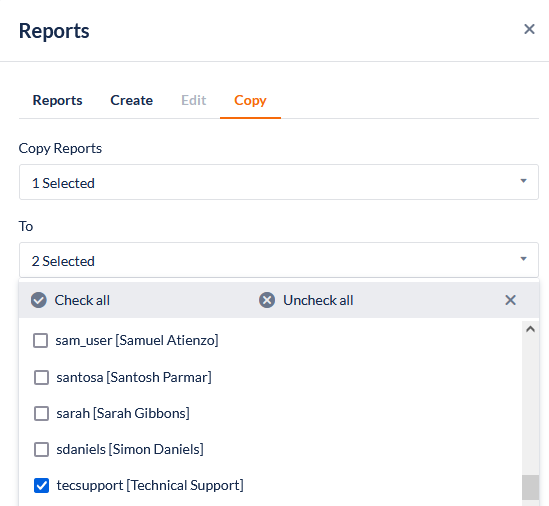
-
Click Copy. The copied reports will now appear in the shared users’ reports tab.
3. Manage your report page
Once reports have been added to a page you can:
-
Drag the report window by its Header Bar to relocate it on the page.
-
Drag the lower right corner of the report window to resize and reshape it. Use this resize control to force the report to fill the available space by making a small adjustment and triggering a redraw of the report.
-
Click the Close icon in the Header to close the window
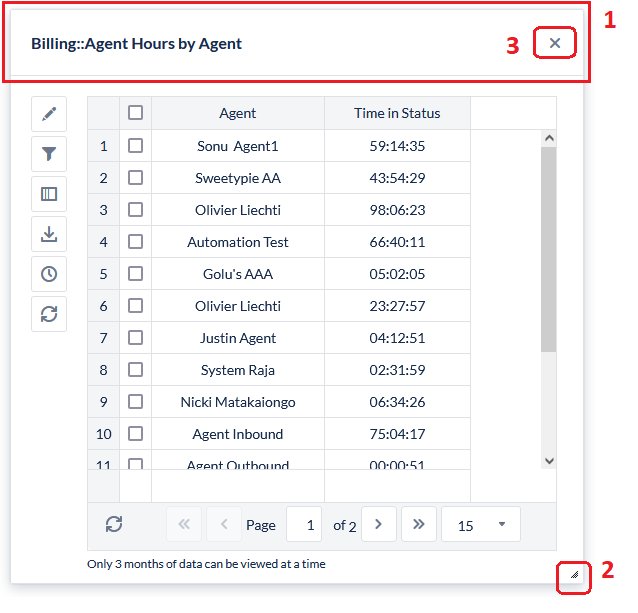
Each report has a toolbar with the following icons:
|
Icon |
Description |
|
|
Opens the Manager tab in the report’s settings explained in the following section |
|
|
Opens the Filter pane on the Edit tab of the report settings explained in the following section |
|
|
Opens the Field Selection |
|
|
Download the report |
|
|
Schedule a report export see following section for more information |
|
|
Refresh report |
Each report displays navigation controls to move between pages of results or to change the number of results displayed per page
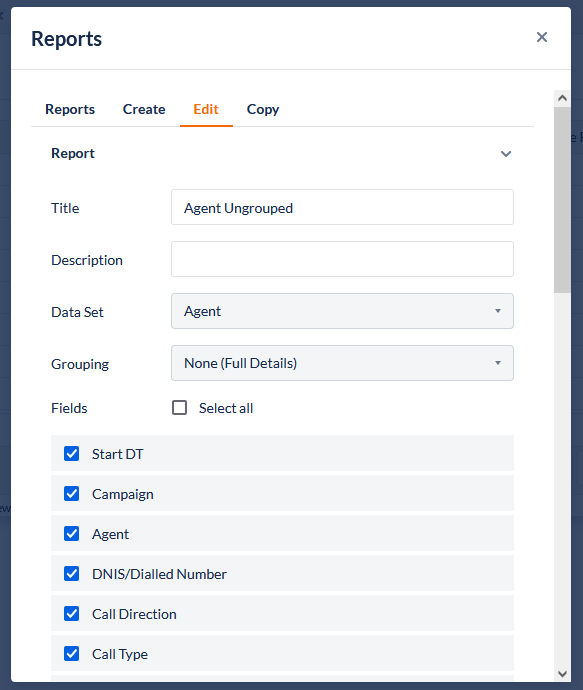
4. Report Settings
When you edit or create a new report you will be presented with a number of settings you can modify:
-
In the Report pane, enter a title for the new report.
-
Enter a short description of the report, one that will assist you to remember the purpose of the report.
-
Select the Data Set from which the report will take its data. See Reports Datasets for assistance with your choice.
-
Select the way the report data will be grouped, e.g. group all records by the campaign, or by agent, or by date or not at all. An ungrouped report, also known as a detailed report, shows each individual record on a separate row.
-
Select which dataset fields will be used in the report by clicking on the check box beside their name.
The Dataset and Grouping cannot be changed once they have been saved
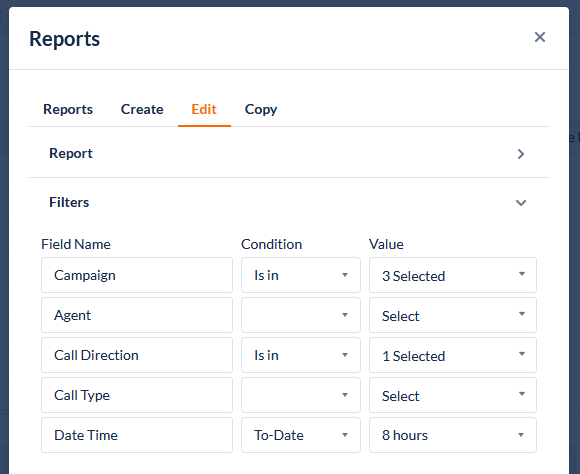
Filters
You can preset filters now or set them each time you use the report.
-
Click on the Filters pane.
-
Choose which filters you will use to restrict which data is included.
-
Select whether the filter causes the inclusion (is in) or exclusion (is not in) of data.
-
Select the value used by the condition to filter the data. Set initial values low until you have tested the report and understand the amount of data involved in its production.
-
Repeat steps 2 to 4 to set additional filters.
Settings
-
Click on Settings to expand its pane. This pane is used to set the report type, however, most reports are best displayed in a simple grid format.
-
Select View Type.
-
Enter the duration, in seconds, between data refreshes. Note, the minimum refresh value for a report is five seconds.
-
Enter the Width and Height, in pixels, of the report window.
Screenshot: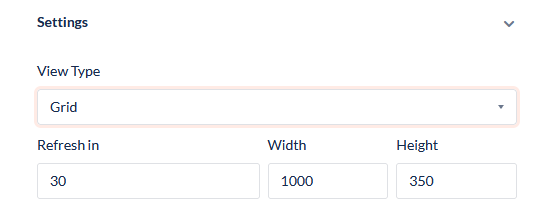
It is also possible to re-size the report window by dragging the lower right corner of the window after the report has been placed onto a report page.
Advanced Settings
Click on Advanced Settings to expand its pane. Some reports may have no Advanced Settings.
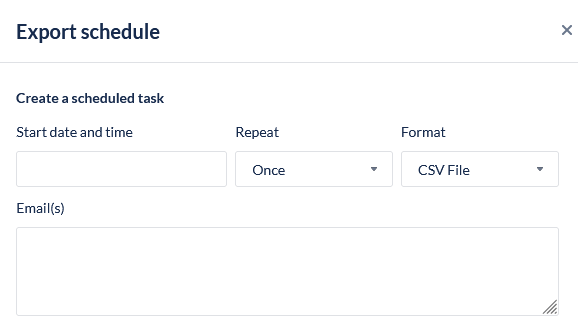
5. Scheduled Report Export
This feature allows you to nominate when the report is exported and to whom. Each report on a report page has a Schedule Export button:
You must have created and validated an organisation email channel in order for the report export process to work. See Create or update an email channel.
Create a scheduled task
-
Click on a day to select the date on which the export will first take place, and then use the hour and minute sliders in the calendar control to set when it will begin.
a. Click on Now to set the date to today and the time to the current time so you can test the export process.
b. Add at least a minute to allow for processing time.
-
Select the frequency of repeated exports. Choose between: once only, hourly, daily, weekly, monthly or yearly.
-
The format that the exported file will use is currently limited to .csv (Comma-Separated Values).
-
Enter the email address(es) for the report recipient(s). If you don't provide any email address(es), then the report will be exported as a file and stored on the server. It can be retrieved from there by operations staff, and manually or automatically forwarded to the required destination
-
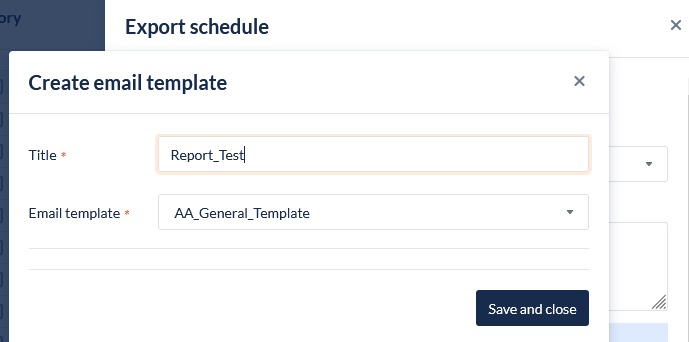
Add an Email Template to the scheduled report
Add an Email Template to a scheduled task
-
Click the Add icon to set the Email Templates to which the report file is to be attached.
-
Enter a Title for the schedule email template
-
Select an Email Template from the drop-down menu, and click Save and Close
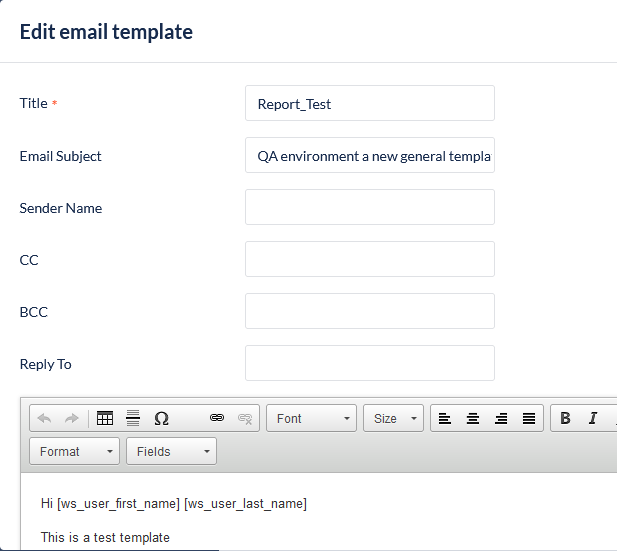
Edit the Email Template on a scheduled task
-
Click the Edit icon to open the Edit email template window
-
Make changes as required and click the Save button
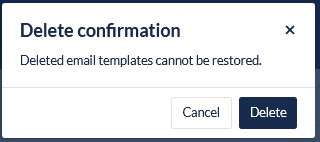
Delete the Email Template on a scheduled task
-
Click the Delete icon to remove the Email template
-
To proceed, click the Delete button on the confirmation screen
Once a template has been assigned to a scheduled task it can not be deleted
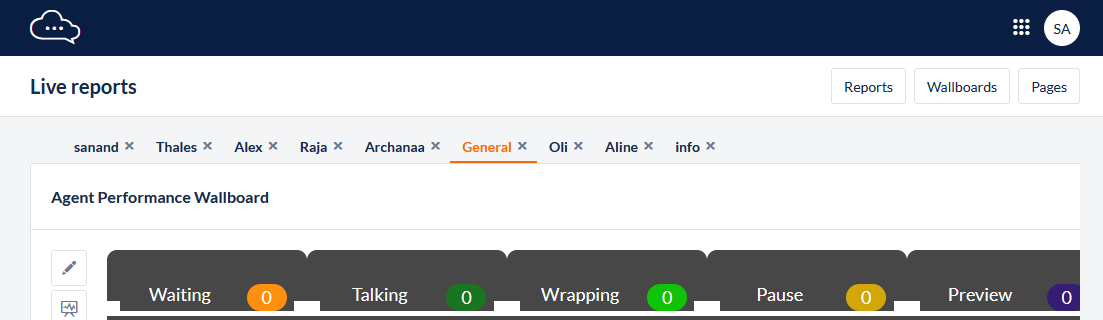
6. Wallboard Reports
This feature allows you to create and configure a collection of report pages, containing wallboard reports or any other reports, that can be viewed in a browser and potentially displayed on a flat-screen panel on the wall of a contact centre or on a manager's tablet PC.
-
Open the Workspace and select Live Reports
-
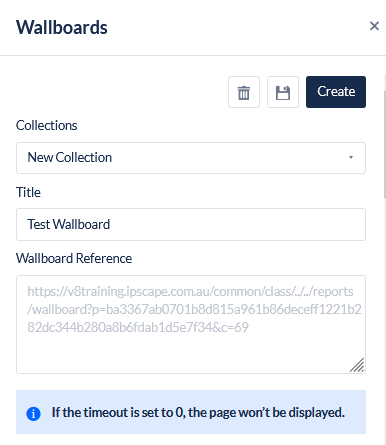
In the Reports Module, click Wallboards in the top right to open the Wallboards window.
-
Click Create to start a new collection. All your report page names will be displayed by default.
-
Enter a relevant name for this collection in the Title field
-
Decide which report pages you wish to add to the collection and set the refresh period (in seconds) for each report. The default is 5 seconds.
-
Set the timeout for the report pages. If you do not wish to add to the collection set this timeout to 0 secs.
-
Set the order in which the wallboard displays should be rotated.
-
Click the Save icon.
-
Copy the wallboard Reference URL and send it to whoever will be viewing the wallboard display. The recipient can enter the URL into their browser and receive a live reporting display that rotates between all the pages specified.
7. Date and Time Settings
These are the date and time-related formats available for use in the Contact Centre reports.
The format used for Dates and Times in each report is the format set by the Administration Team in Timezone Settings.
|
Format |
Description |
|
Date Time |
Timestamp in Date and Time format as set by the Administration Team
|
|
Date Only |
Timestamp in Date only format as set by the Administration Team
|
|
Month |
Timestamp in Month/Year format (mmm YYYY) e.g. April 2014 |
|
Day |
The day of the week e.g. Monday, Tuesday... |
|
Hour |
Timestamp in Hour of the Day format (HH:MM - HH:MM) e.g. 14:00 - 15:00 |
Timestamp Filters for Reports
These are the date and time filters available for use in the Contact Centre reports.
|
Filter |
Description |
|
Equal |
Enter an exact time and date to locate a specific record |
|
Greater than |
Enter a time and date to locate all records created since that time and date |
|
Range |
Enter a beginning and an end time and date to define the range of records included |
|
To Date |
The reporting range ends at the moment the report is created or refreshed.
|
|
Last |
The reporting range is for the preceding calendar event
|