
Overview
Organisations are able to route, access, and respond to customer emails more efficiently using the IPscape Email module.
The Email Channels module allows a Workspace Administrator to add and manage email accounts to be used for incoming and outgoing email communications.
-
Open the Workspace.
-
Select Email under Channels in the side panel
What are Email Channels?
Email Channels are the mechanism by which:
-
Incoming emails are retrieved from mailboxes and are routed to an appropriate email campaign for processing by agents.
-
Outgoing emails send emails out for example for Live Reports or to send Voicemail files.
As of 01/10/2022, Microsoft Outlook email addresses may not be compatible with POP3, IMAP or SMTP settings.
See https://knowledgehub.ipscape.com/Workspace/Microsoft-Exchange-Online---Azure-configuration.1668317214.html for more information
It is recommended that email addresses that are also used for other purposes (i.e. personal or shared addresses) are not assigned to an email channel if using POP3 and Microsoft Exchange as the Cloud Contact Centre Solution will retrieve all incoming emails.
Distribution group email accounts within Microsoft Exchange cannot be configured or validated as Email Channels due to permissions.
-
Receiving Emails (Inbound)
POP3 (Post Office Protocol 3)
IMAP (Internet Message Access Protocol)
Microsoft Exchange Online -
Sending Emails (Outbound)
SMTP (Simple Mail Transfer Protocol)
Microsoft Exchange Online
1. Add an Email Channel
-
Open the Workspace
-
Select Email from the Channels in the side panel to open the Create email channel window
-
Configure the settings (more details below) and click Save
Settings
|
Field |
Description |
|
Channel name |
Enter the name of the Email Channel. This is a required field. |
|
Email Address |
Enter the email address assigned to the channel |
|
Default Campaign |
Select the Default Email Campaign to which emails retrieved by this channel are delivered. This campaign is only the default - if filters are defined, their campaign selections override this setting whenever matching emails are retrieved. Nevertheless, a default campaign must be defined before an Email Channel can be activated, otherwise the system will not know what to do with retrieved emails that didn't match any of the channel's defined filters. |
|
Channel activation |
Click the Checkbox to activate the channel and cause it to retrieve emails on a regular basis. |
The Channel Activation checkbox can only be checked if a default email campaign is defined. A user must create an Email Campaign in order to be able to activate an email channel.
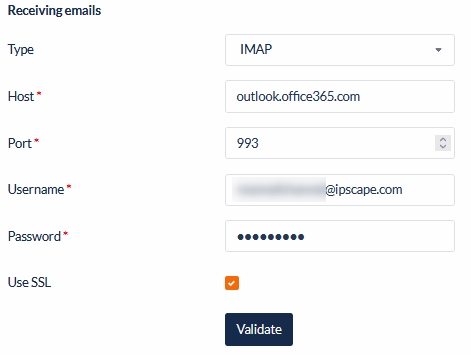
Receiving Emails
Select the Type of email protocol for receiving emails, enter the email server settings and click Validate.
IMAP & POP3
Both IMAP & POP3 require the following server settings configured for the receiving (inbound) emails:
Sync All Inbox Folders (Microsoft Exchange and IMAP only)
Enabling this feature will result in emails being pulled from all receiving folders within that email address (eg. primary inbox, sub-folders of the primary inbox, junk mail, other folders), rather than only from the primary inbox.
Sync When Recipient Only
This feature is designed to filter emails based on the presence of the email address in the To, CC, and BCC fields. Users can toggle the checkbox to select or deselect this filtering behaviour.

-
When the checkbox is selected (checked), only emails that include the specified email address in the To, CC, or BCC fields will be fetched.
-
When the checkbox is deselected (unchecked), all emails, regardless of the addressee, will be fetched.
For existing email campaigns, the "Sync when recipient only" checkbox is checked by default to maintain the current behaviour. This ensures that users do not experience any disruption in their email fetching process.
For all new Email Channels, the "Sync when recipient only" checkbox will be unchecked by default. Users can modify this setting based on their preferences and requirements.
Forwarded Emails:
Some email providers may overwrite the TO field with the forwarding email address. Others may retain the original addressee in the TO field.
IPscape acknowledges that this behaviour is outside its control, as it depends on the practices of individual email providers.
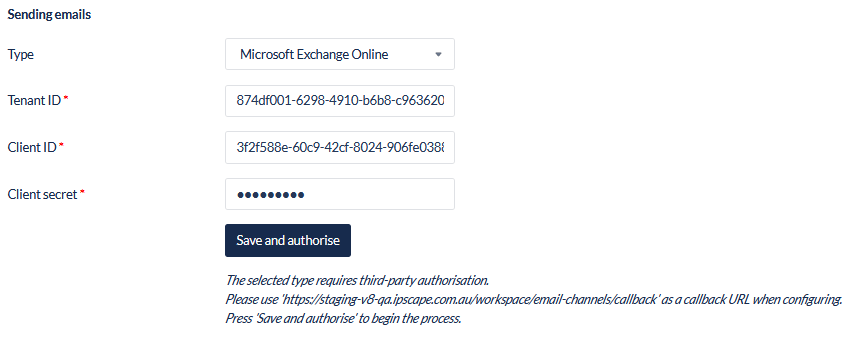
Microsoft Exchange Online
Microsoft Exchange Online requires the following server settings configured for receiving (inbound) emails:
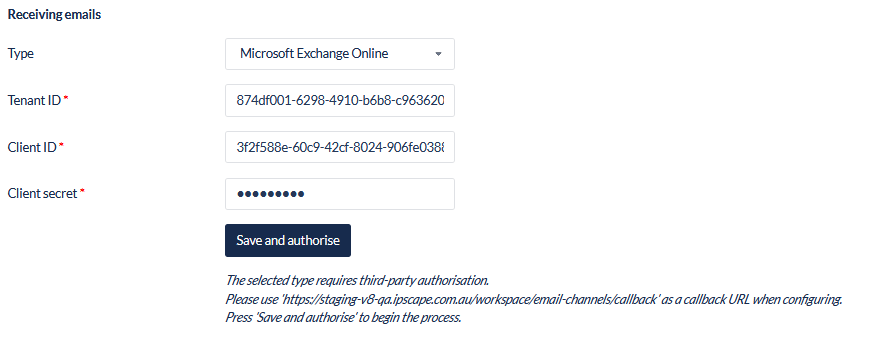
More information on the callback URL for Azure administrators can be found here: https://knowledgehub.ipscape.com/Workspace/Microsoft-Exchange-Online---Azure-configuration.1668317214.html
By default, some cloud-based email providers do not allow POP download and they retain copies of all emails in the Inbox (e.g. Google). A user need to ensure that the mailbox is configured in a way that:
-
POP is enabled
-
The "Delete Mail's copy when messages are accessed with POP" option has been activated.
The IPscape email fetching tool will only retrieve emails that include the To: address is matching what is configured in the Email Channel.
For example: Distribution emails, when forwarded to a shared or main email account will keep it’s To: address and will not be fetched. The channel email address can not be only in the CC: or BCC: field.
This can be worked around by implementing a Rule within the mailbox where emails sent to a distribution address are forwarded back to the address configured in Email Channels.
For any further assistance please reach out to IPscape Support: https://ipscape.atlassian.net/servicedesk/customer/portal/5
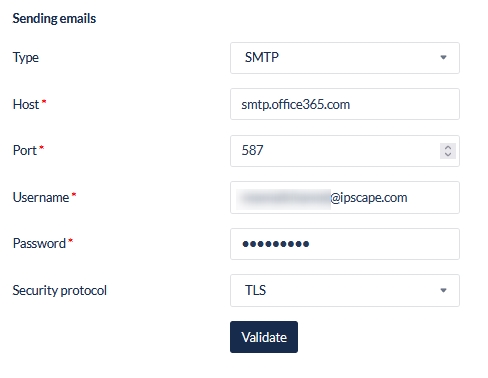
Sending Emails
Select the Type of email protocol for sending emails, enter the email server settings and click Validate.
The maximum size for sending email attachments through an IPscape Email Channel is 20MB
SMTP
SMTP requires the following server settings configured for sending (outbound) emails:
Microsoft Exchange Online
Microsoft Exchange Online requires the following server settings configured for sending (outbound) emails:
More information on the callback URL for Azure administrators can be found here: Microsoft Exchange Online - Azure configuration
It is important to use a browser in Incognito mode when validating an email channel.
Validate Email Channels - POP3, IMAP, or SMTP
Click Validate to initiate a search over the Internet for the relevant server (POP3, IMAP, or SMTP). This process attempts to contact the server and check whether the email account is valid. The entire process can take up to 1 minute - depending on the configuration of the mail server(s) involved.
Validating a server configuration is recommended, but not mandatory. Whatever server settings are input can be saved, and the system will attempt to use them whether validated or not.
For more information about Cloud Email service providers and configuration, please visit ARCLAB.
Validate MS Exchange Email Channel
First the configuration of the Microsoft Exchange account should be completed in Azure before setting up and validating the channel: https://knowledgehub.ipscape.com/Workspace/Microsoft-Exchange-Online---Azure-configuration.1668317214.html
To authorise or validate a Microsoft Exchange email channel:
-
The workspace user must be logged in using their Username and Password and not by Microsoft SSO.
-
Ensure the workspace user authorising the channel is logged out of any other Azure accounts and only logged into the email channel account to be validated
-
Click Save and authorise
-
Select or enter the Microsoft email account details configured for the Email Channel
-
After logging in, the user will either automatically be authorised; or the user may be presented an error due to incorrect configuration of the Email Channel.
Please see below examples for issues that users may encounter when validating an email channel:
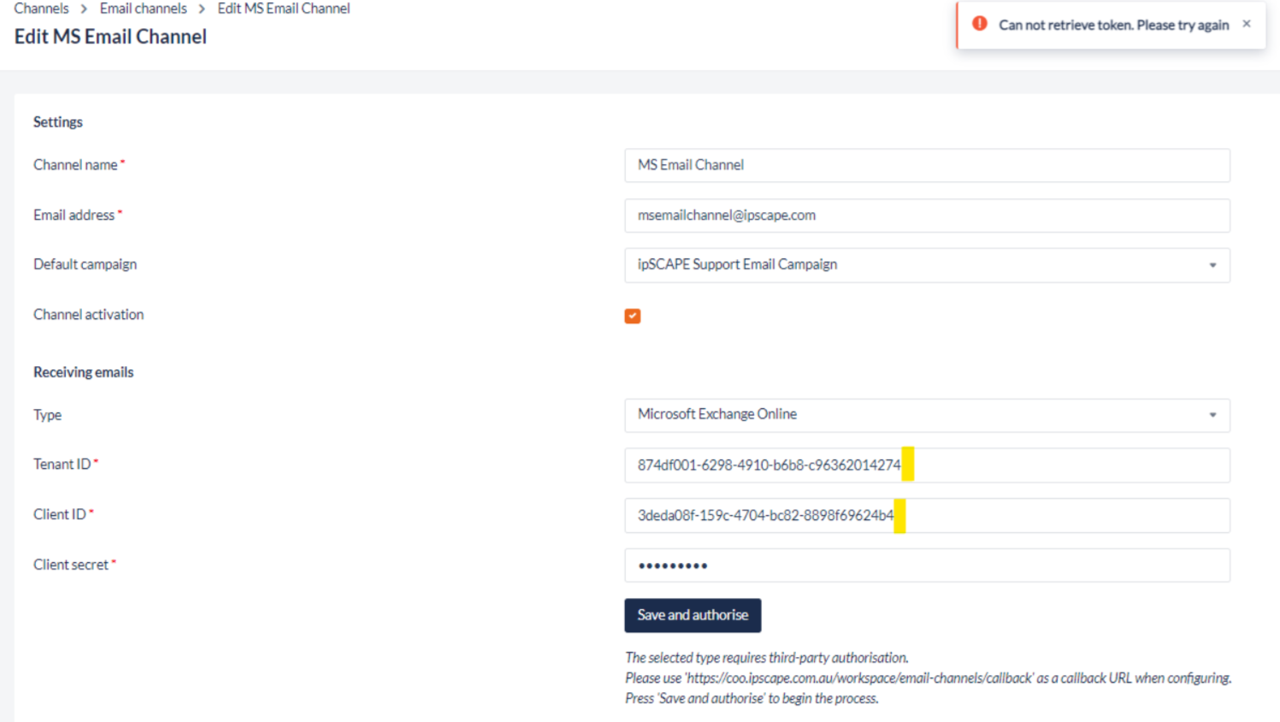
Error - Can not retrieve token
This error occurs when:
-
A space is included at the end of the Tenant ID, Client ID or Client secret
-
Any of the values added in the field is incorrect
-
Client Secret is expired and needs to be updated
Error - Redirect URI is incorrect or not entered:
See Microsoft Exchange Online - Azure configuration - Redirect URI for information on this configuration.

2. Add Email Channel Filters
Email filters can be used to create incoming email routing strategies within an Email Channel based on keywords in the sender, subject or body fields of an email.
For more information on creating Email Filters, see: https://knowledgehub.ipscape.com/Workspace/Email-Filters.1670217729.html
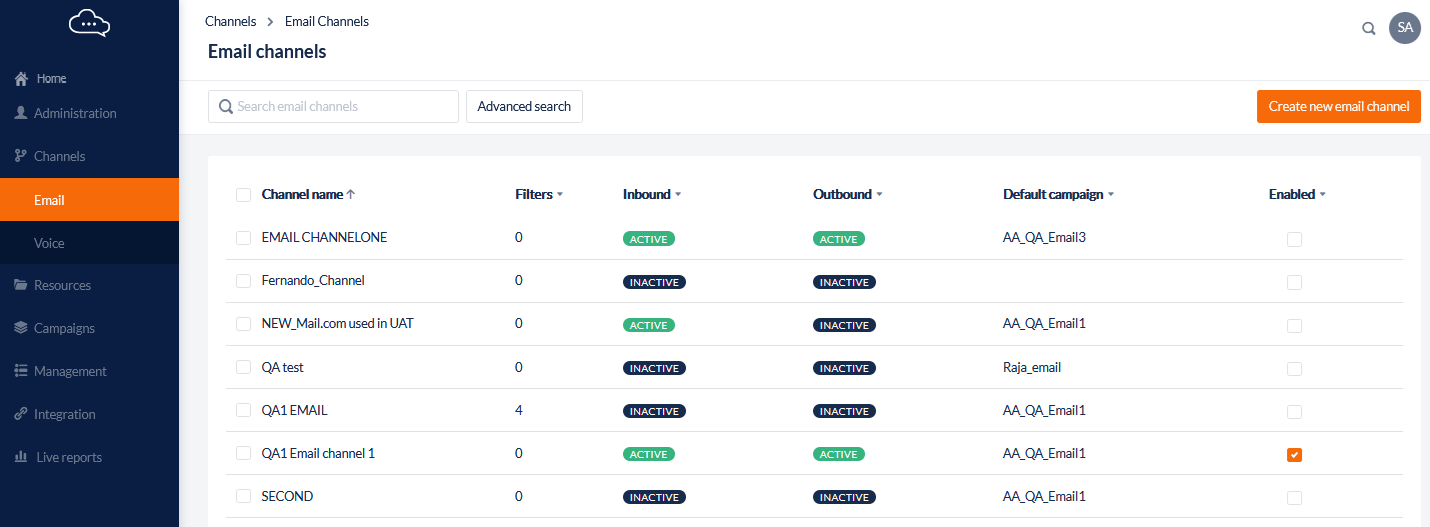
3. Display Email Channels
This feature allows a user to navigate, add, edit or delete email channels created in the contact centre. From this list, a user can also add or edit email filters.
A list of channels is displayed with the following details:
|
Column |
Contents |
|
|
Click the Selection Checkbox to select/deselect the Email Channel. |
|
Channel Name |
The name that has been assigned to this Email Channel is displayed. |
|
Filters |
A count of the filters assigned to the email channel. More details on the filters can be found by clicking Filters under the options: 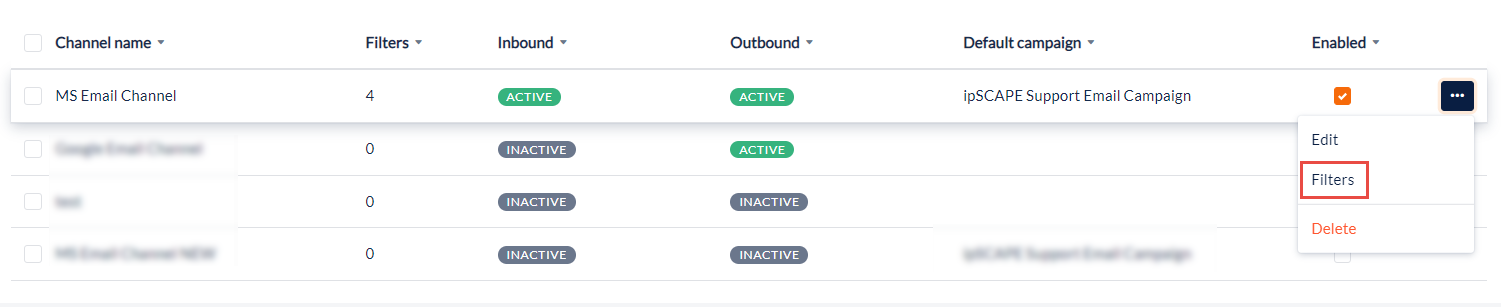
|
|
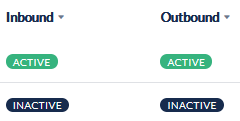
Channel Indicators
|
Indicators showing the status of the channel. Active indicates the channel has been validated as is working Inactive indicates the channel has not been validated or is experiencing an issue and may need to be re-validated. |
|
Default Campaign |
The Campaign to which emails are retrieved through this channel will be assigned if no filters are defined, or if an email doesn't match any of the filters. |
|
Enabled |
A checkbox to enable or disable an email channel |
|
Options |
The more options icon appears if the mouse is hovered over an email channel. Click Edit to open the Edit Email Channel window.
|
Quick Search
If the Channel Name is known, enter it, or a part of it, into the Quick Search field and click the Search icon to locate the channel with that ID.
Advanced Search
This advanced search features allows users to reduce the list of email channels that are displayed using one or more search criteria.
-
Click Advanced Search to open the advanced search options
-
Enter the search criteria
-
Click Search
The search criteria include:
|
Search Parameter |
Description |
|
Default Campaign |
Select the default Campaign of interest. The search lists all Email Channels which use this Campaign as their default, but does not list Email Channels which route emails to this Campaign through the use of filters. |
|
Channel name |
Enter the name of the Email Channel of interest. |
|
Status |
Select one of All, Active, or Inactive. |
|
Email address |
Enter the Email Address of the mailbox of the Email Channel of interest. |
4. Edit or View Email Channel
This feature is used to edit or view an existing email channel.
-
Open the Workspace.
-
Select Email from the Channels in the side panel.
-
Click on the email channel to edit in the list displayed to open the Edit email channel window.
-
Make changes if required and click Save or, click Cancel or the ‘X’ to exit the window