This feature allows you to edit the list of wrap codes that an agent can access when wrapping an interaction with a contact for the selected campaign.
Wrap codes are selected by the Agent upon concluding the interaction, the feed directly into reports and can also launch actions (e.g. send an email or SMS).
Wrap codes can be created by clicking the Create new wrap code from the campaign wrap codes or in the Workspace Resources > Wrap Code Pool.
See Resources > Wrap Code Pool for more information on creating a new Wrap Code.
Assign a new Wrap Code to a Campaign
-
From the Workspace, navigate to the Campaign Configuration
-
Go to Wrap Codes in the selected campaign
-
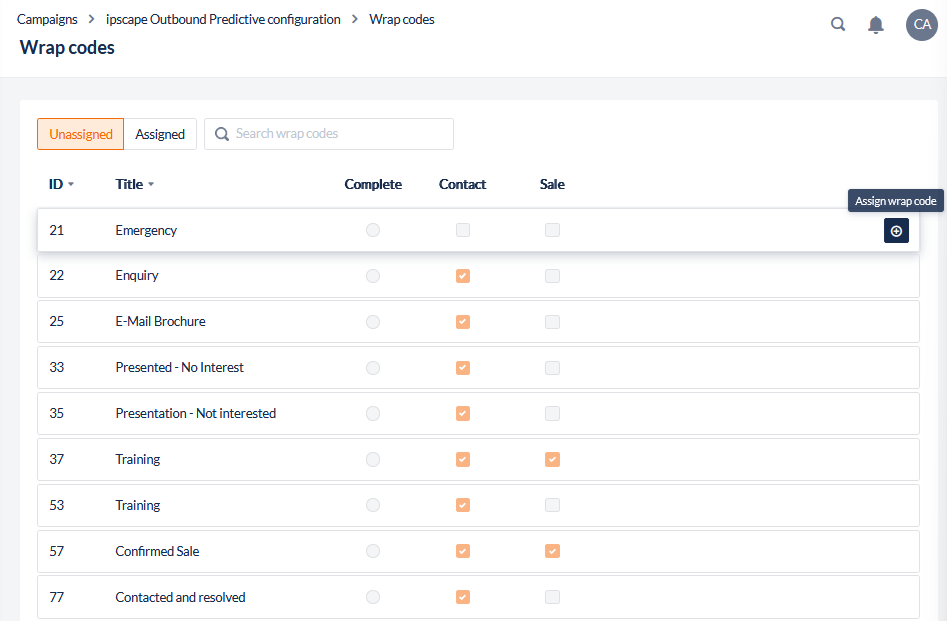
Click the Unassigned button to show all wrap codes available to be assigned.
-
Locate the wrap code from the list or by the search function to assign and click the Assign wrap code icon.
-
Once assigned, a notification will display to confirm the assignment and the wrap code will now appear in the Assigned view
Wrap code must be marked as “Complete” in the Wrap Codes Pool before it can be selected.
Remove an assigned Wrap Code from a Campaign
-
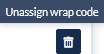
To remove a wrap code, while on the same page as the previous section click the Assigned button to show all assigned wrap codes and click the Unassign wrap code icon next to the wrap code:
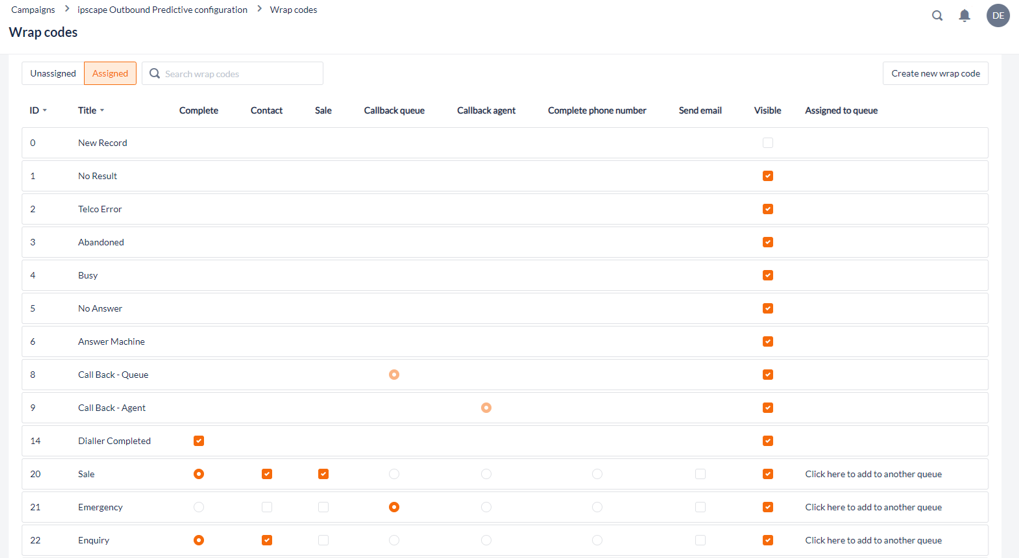
Default wrap codes (for example, New Record, Dialler Completed, Call Back - Agent / Queue) can not be removed.
To make these unavailable to the Agent to select in the Toolbar, uncheck the Visibility checkbox and click Save.
1. Add to Queue
The Add to Queue feature enables a record to be moved to a different queue in ipSCAPE based on the Wrap Code selected by the Agent.
-
From the Workspace, navigate to the Campaign Configuration
-
Go to Wrap Codes in the selected campaign
-
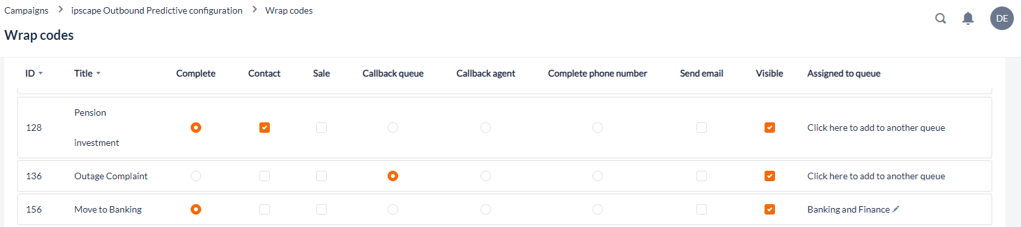
Click the Assigned button to show all wrap codes assigned to the campaign
-
Next to any wrap code which is not a Default wrap code, the option to add or edit the assign queue will display in the list view
-
To add to another queue, click the link to open the dialog window
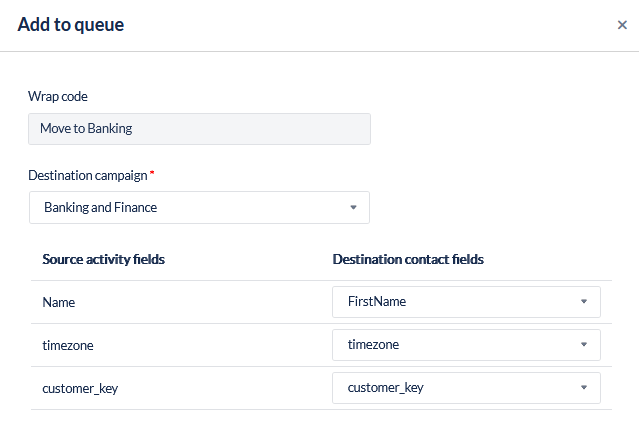
-
The name of the wrap code will be displayed and will be unable to be edited. To select a different wrap code go back to the wrap codes page.
-
Enter the Destination campaign from the drop down list
-
If required, map any Activity Fields for the destination.
-
Click Save
-
In the wrap codes view, the new Add to Queue campaign will display next to the wrap code in the list which can be edited by clicking the icon next to the campaign title:
2. Complete Phone Number
When a user assigns a wrap code to an Outbound Campaign, a few options are available to mark the status of a Lead such as Callback Agent, Callback Queue, Complete and Complete Phone Number.
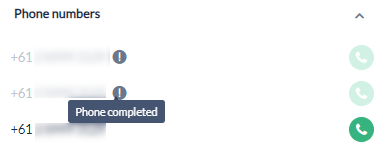
The Complete phone number wrap code lets agents mark a single phone number within a Lead as done, without affecting the other numbers in the same Lead. This option does not alter the callback date and time for the Lead, if any.

The completed number in the Lead will be greyed out and show an icon next to it. This means that the number is not available for dialling.
Examples of how to use Complete, Contact and Sale
Outbound Campaigns
For Outbound Campaigns, the ‘Complete” tag is used to instruct the dialler to no longer contact this Leads - it is 'Completed’ and no further attempts will be made.
The 'Contact” tag is purely for reporting purposes. Different outbound clients define this differently. For example, some clients in a sales focused environment will define a contact as a Sale or a No sale - i.e. the agent has spoken to the Lead and achieved a final result - thus providing a true conversion rate of sales divided by opportunities. In this scenario, call backs are not considered contacts because the final result has not yet been reached.
A ‘Sale’ tag, will feed into the reports to measure how many successful outcomes have been achieved. The system uses the term “Sale” however this can be renamed in the reports to be whatever you define as a successful outcome of the call.
Inbound
The platform uses the same wrap code interface for both Inbound and Outbound campaigns. All wrap codes on an inbound campaign (excepting only callbacks) are completes, and all wrap codes are contacts. Some may be “Sales” and like outbound, this is a term for a successful outcome and can be renamed in the reports.
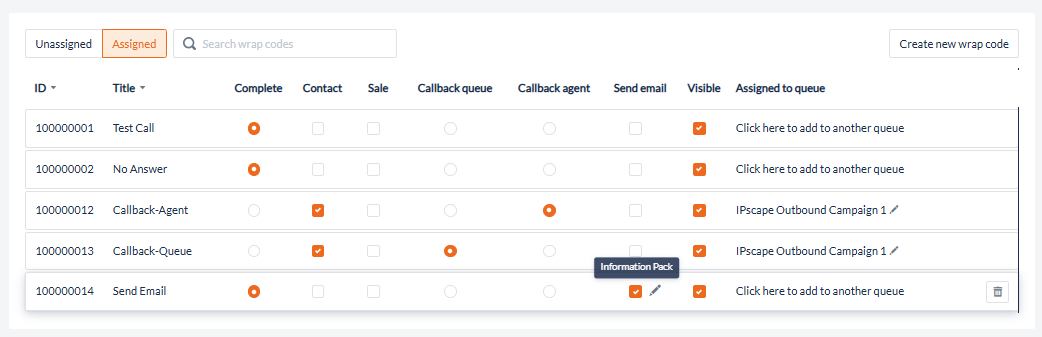
3. Send Email
The “Send Email” option next to the Wrap code allows you to send an email once the Wrap Code has been selected to complete the call.
To use this feature the below components need to be created and setup in your environment:
-
Email Channel - used to send the email
-
Email template - used to populate information from the call and sent
Both the Email channel and the Email Templates need to be assigned to the campaign before the “Send Email” option can be set up.
Once both the Email Channel and the Email Templates have been created, you can select the “Send Email” tick box next to the wrap code you wish to send an email from. It will then ask you to select an email template to assign, as seen below.
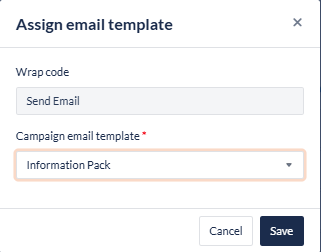
Once selected and assigned, you will be able to hover over the tick box to see the name of the email template assigned. You will also see an edit option to change the assigned email template.