
Overview
The Files module allows you to upload and manage files that are then available as Resources in the system.
-
Open the Workspace
-
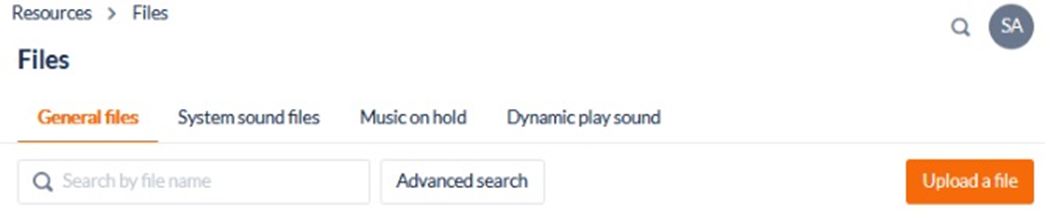
Select Files from the Resources menu. There are three file displays available: General Files, sound files, and MOH Playlists
-
Click on the file type icons at the top of the page to toggle between the file types
File Types
Files are any resources that can be used in a campaign, such as voice recording, music, images, MS Office files, logos etc:
-
General Files
These are all non-sound files that can be associated with a campaign including logos, images, documents or zip files. There is no restriction to the file type for general files.
-
System sound files
Sound files are pre-recorded digital files used to communicate with, or prompt actions from, external contacts during a workflow or as an announcement played during a call.
-
Music on Hold Playlists
Music on Hold (MOH) is the business practice of playing recorded music to fill the silence that would be heard by telephone callers who have been placed on hold. A playlist is a list of sound files scheduled to be played in a particular sequence. -
Dynamic Play Sound Lists
These are playlists referenced by the Dynamic Play Sound Workflow object
1. Add or Edit a File
This feature is used to import and maintain files in the contact centre files repository for use in one or more campaigns.
-
Open the Workspace.
-
Select Files from the Resources menu.
-
Click General Files from the header:
-
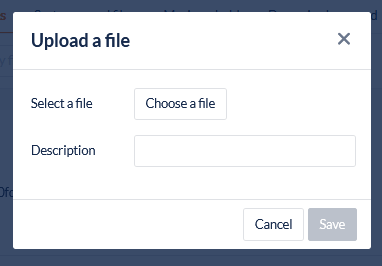
To import a new file, click the Upload a file button to open the dialog.
-
To change the details of a file in the Files list, click the breadcrumbs icon at the end of the row that displays its details, and select Edit
Import a general file type
|
Field name |
What you should do |
|---|---|
|
Select a file |
Click Choose File, then navigate to and select the file you want to upload from your PC to the Files repository. |
|
Description |
Enter an explanatory textual description of the contents of the file. Although this field is optional, it is useful to record some explanatory text about the file, particularly if the filename is brief, or cryptic. |
When you have entered all the required details, click Save to save your changes. The dialog will close and you will be returned to the Files list.
Edit an existing general file type
|
Field |
Description |
|---|---|
|
Description |
Enter, or modify, the textual explanatory description of the contents of the file. |
|
Original File Name |
This is a read-only field that displays the name of the file.
|
When you have entered all the required details, click Update to save your changes. The dialog will close and you will be returned to the Files display.
2. Add System Sound Files
This feature is used to import or create sound files in the contact centre files repository for use in one or more campaigns.
Where to find this feature
-
Open the Workspace.
-
Select Files from the Resources menu.
-
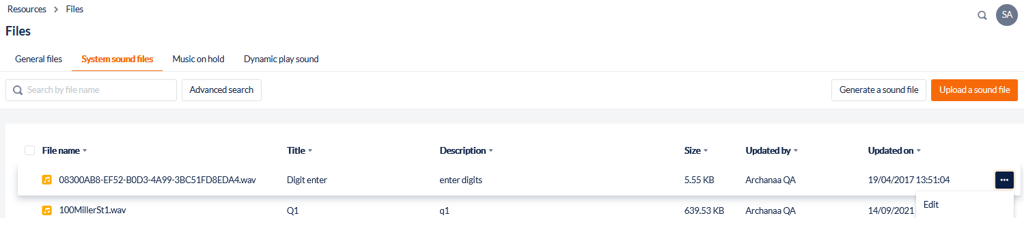
Click System sound files from the header
-
To add a new sound file, click the Upload a sound file button in the header row to open the Upload a File dialog, or
-
To generate a new sound file using Text-to-Speech (TTS), click the Generate a sound file button in the header to open the Generate a sound file dialog. Please note you will need to create a default TTS profile first - to create a default TTS profile visit Text-to-Speech (TTS).
-
To change the details of a sound file in the list, click the breadcrumbs icon at the end of the row that displays its details, and select Edit
Add a Sound file
Select between uploading an existing sound file or generating a new sound file
Upload an existing sound file
|
Field |
Description |
|---|---|
|
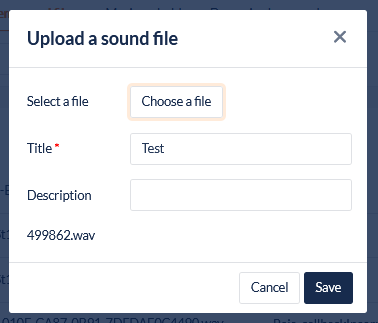
Select a file |
Click Choose File, then select the file you want to upload from your PC. |
|
Title |
Enter a meaningful name for the sound file. |
|
Description |
Enter a description of the contents of the file. Although this field is optional, it is useful to record some explanatory text about the file, particularly if the file name is brief, or cryptic. |
|
File name |
If a file has been selected, the original file name will display here |
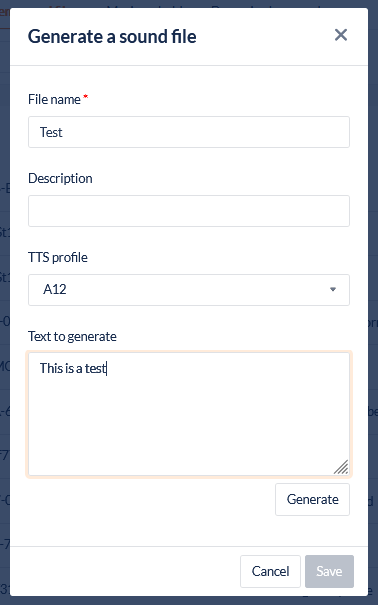
3. Generate a Text-to-Speech (TTS) sound file
|
Field |
Description |
|---|---|
|
File Name |
Enter a meaningful name for the sound file. |
|
Description |
Enter a description of the contents of the file. Although this field is optional, it is useful to record some explanatory text about the file, particularly if the file name is brief, or cryptic. |
|
TTS Profile |
Text to speech profile, select the profile you would like to use. See more information in the Text to Speech Profile article |
|
Text to generate |
Enter the text that you wish to be in the new sound file. Refer to the Text to Speech Guidelines below |
|
Generate |
Click the Generate Sound icon and the sound file will be generated as a .WAV file using Text-to-Speech. When ready, the new sound file is played once. If you are unsatisfied with the new sound file, edit the source text and regenerate the file |
3. Text to Speech Guidelines
Non-phonetic Words
A Text to Speech engine maintains a database of pre-recorded sound files for the most common words in the lexicon for each language.
When it encounters a word that is not in the database, it attempts to create a sound file for that word based on phonetics, which can sometimes be unsuccessful. In those instances, words can be broken down phonetically to achieve the desired result.
Pauses
If you need a pause to be inserted anywhere in the sound file you can enter one or more commas (,) to generate a short pause.
To generate a longer pause, a semi-colon (;) can be used.
Numbers
When you enter a string of numbers, Text to Speech will consider it a whole integer. For example, if you enter ‘12345’ the sound file generated will say "twelve thousand, three hundred and forty-five".
To avoid this, insert a comma between the digits, e.g. ‘1,2,3,4,5’.
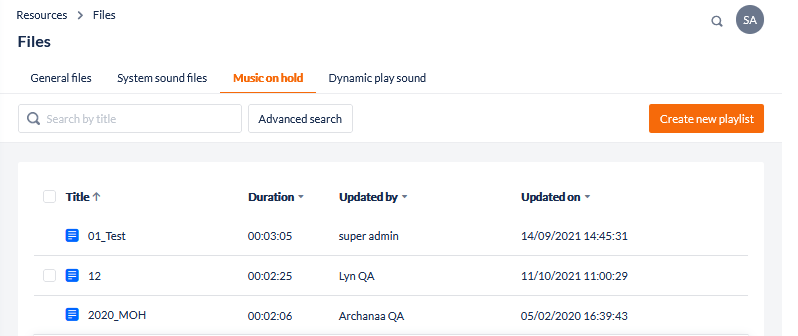
4. Music on Hold Playlists
This module allows you to create and maintain playlists for use throughout the organisation. Because a playlist consists of a sequence of sound files, adding, removing, or replacing one sound file is easy, and topical messages (e.g. marketing messages, holiday messages) can be used and changed regularly and easily. Any such change takes immediate effect and applies to all playlists that include the changed sound file.
Sound files must be added using the previous step before they can be used in MOH Playlists
-
Open the Workspace.
-
Select Files from the Resources menu. There are three file displays available: General Files, sound files, and MOH Playlists.
-
Click on the MOH Playlists icon to display a list of playlists
-
To create a new playlist, click the Create new playlist button in the header row to open the Add Playlist dialog.
-
To edit a playlist, click the Edit option from the options button in the same row as the playlist to open the Edit Playlist dialog.
-
To add a new sound file to an existing playlist, click the Assigned sound files drop-down to open a list of available sound files. You can filter the list of available files by entering a full or partial filename into the search box. Click the sound file to add to the playlist.
-
Next to each sound file name in the playlist is displayed:
-
The duration of the sound file
-
Arrows to move the sound file up or down in the playlist
-
Delete icon to remove the sound file from the playlist.
-
A playlist is constrained to a maximum of 100 sound files.