
Overview
User Roles enables the System Administrator or Campaign Manager to set up roles that have specific permissions. These roles can then be used to assign to groups of people that perform a specific function.
Where to find the User Roles module:
-
Open the Workspace.
-
Select the Administration menu.
-
Select User Roles. The list of User Roles is displayed.
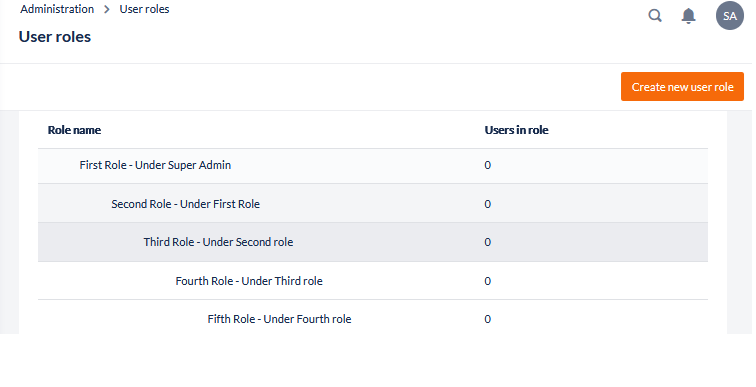
1. Display User Role
This feature allows you to navigate the list of available user roles in the contact centre.
A list of User Roles is displayed. For each user role, the list displays the following details:
|
Column |
Contents |
|---|---|
|
Role Name |
The name of the role is displayed. |
|
Users in Role |
The number of users assigned to the Role is displayed. |
|
|
An Options icon appears if the mouse pointer is located above a row. If this is clicked, the following options are presented:
|
2. Add or Edit User Roles
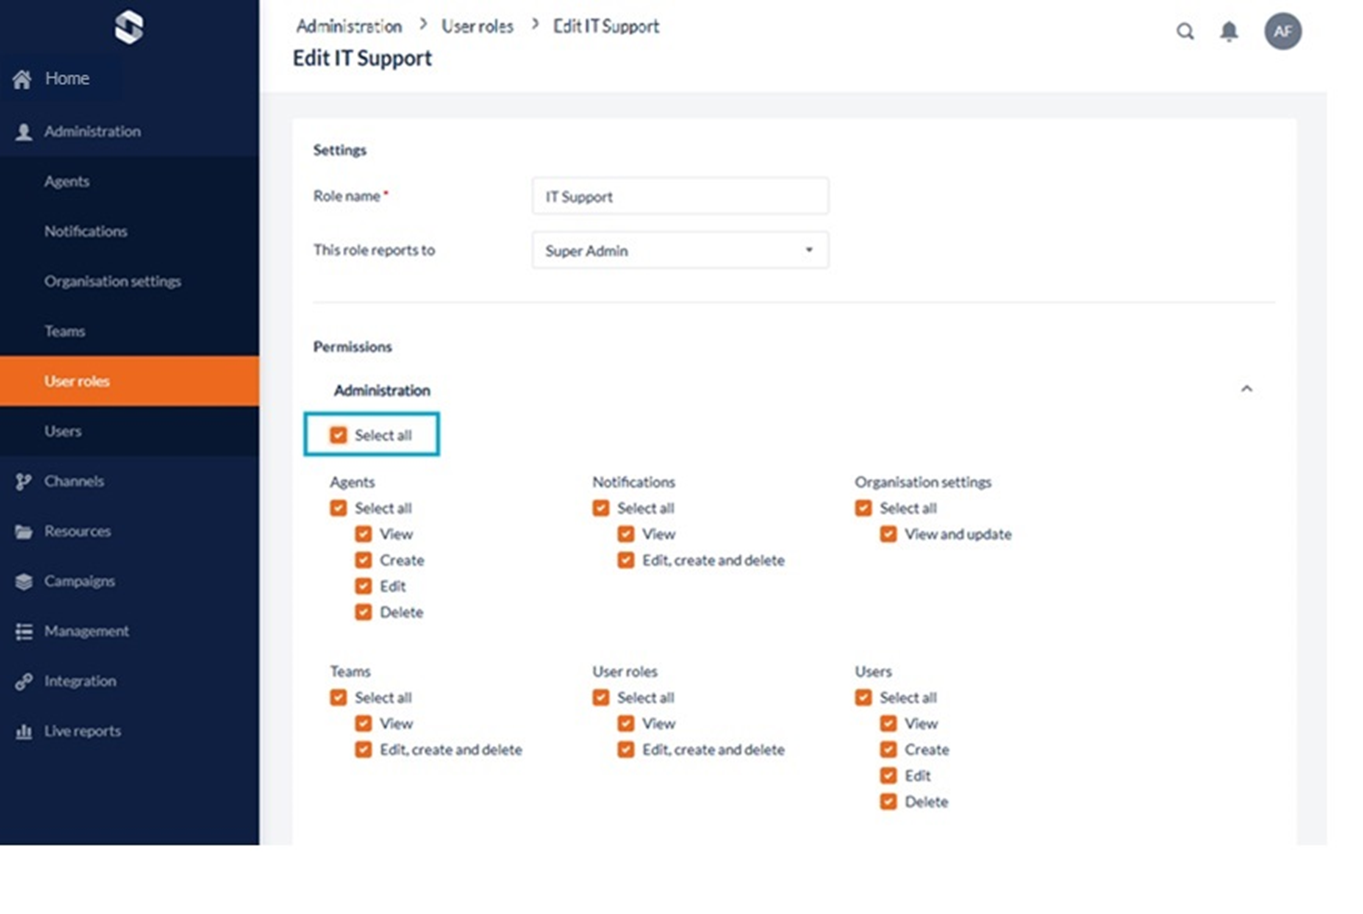
This feature is used to create and configure a new User Role or to edit existing ones.
-
Open the Workspace.
-
Select User Roles from the Administration menu
-
To create a new User Role, click the Create new user role button
-
To edit an existing User Role, click on the Team in the list or Edit from the Options icon to the right of the record.
-
-
Enter the Role Name
-
Select the User Role this Role reports to from the drop-down list
-
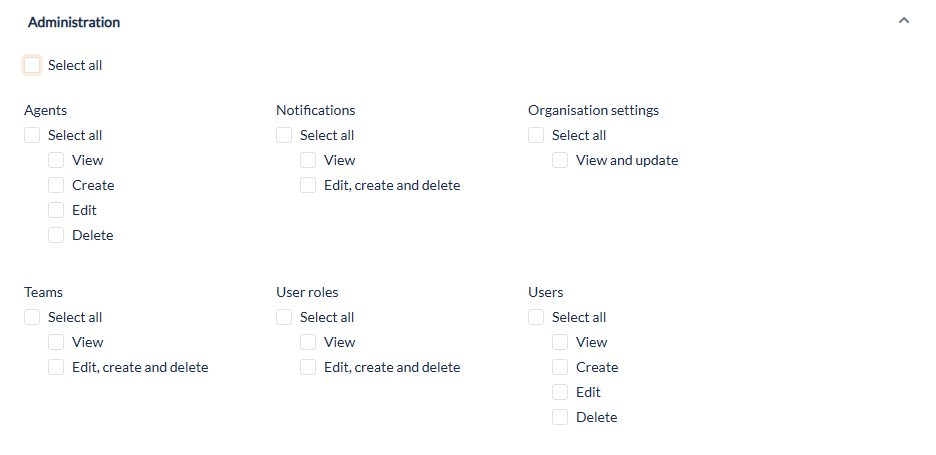
You then assign the permissions to this role. Under Permissions, there are seven titles:
-
Administration
-
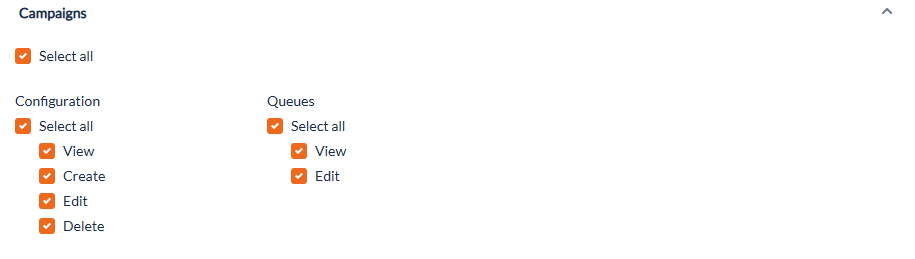
Campaigns
-
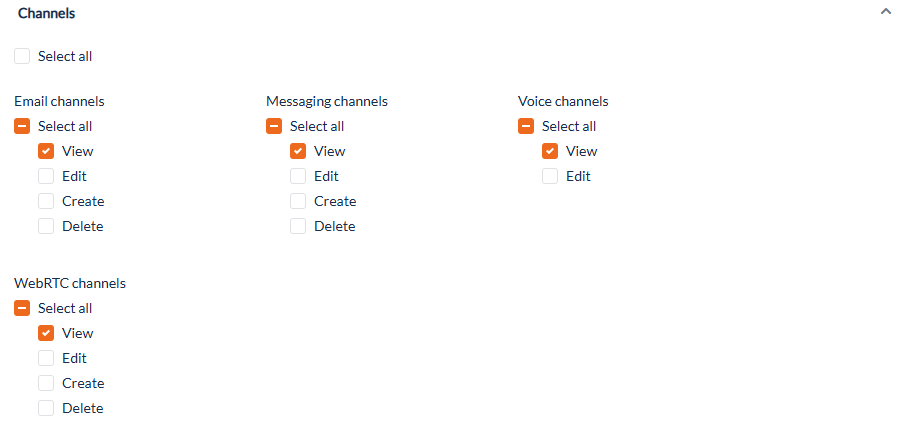
Channels
-
Integration
-
Management
-
Resources
-
Extras
-
These are the modules that can be assigned to this role. Each module has a number of permissions. To assign permissions for each of the modules, there are two options:
-
Select all the permissions available in the module
-
Select specific permissions in the module
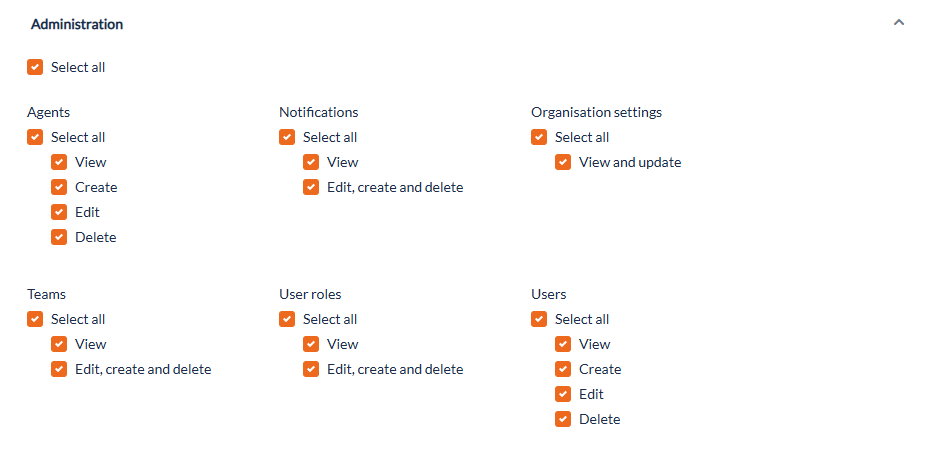
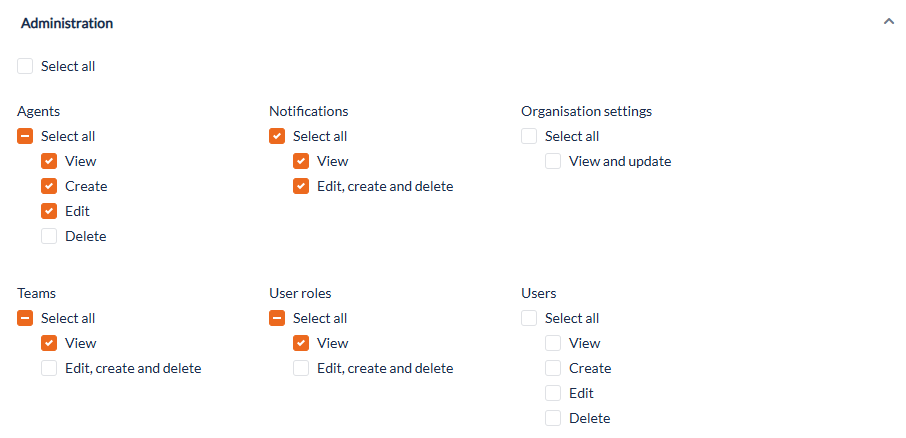
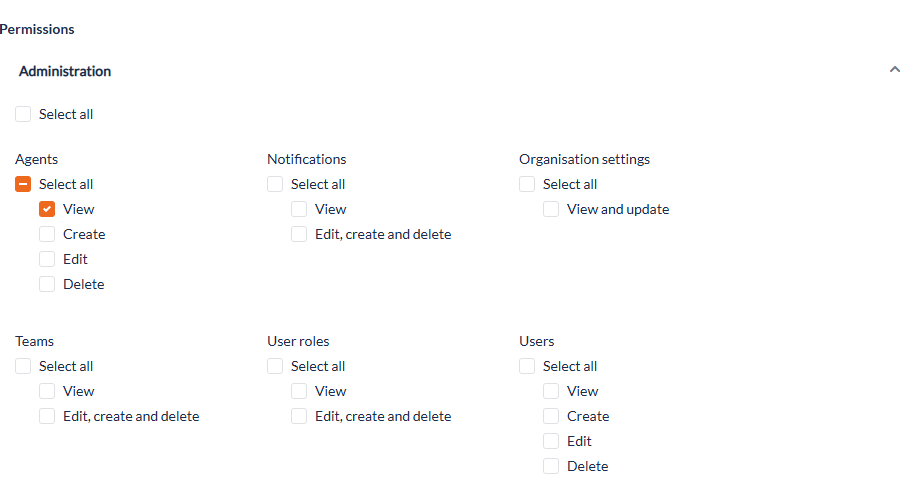
To view the permissions in each of the modules click on title to expand the section. For example, if you want to view the available permissions for Administration click on the Show button against the Administration Module:
When you do this, you will be presented with a list of available permissions. Now you can select the Administration permissions you want to assign to this User Role by putting a tick in the relevant tick box. Please see the example below:

Users who have this role only have view permissions in Administration
Follow this process for each of the modules on this page until you have assigned all the required permissions to this User Role.
Once the User Role has been created, click Save and now a User can be assigned to the Role.
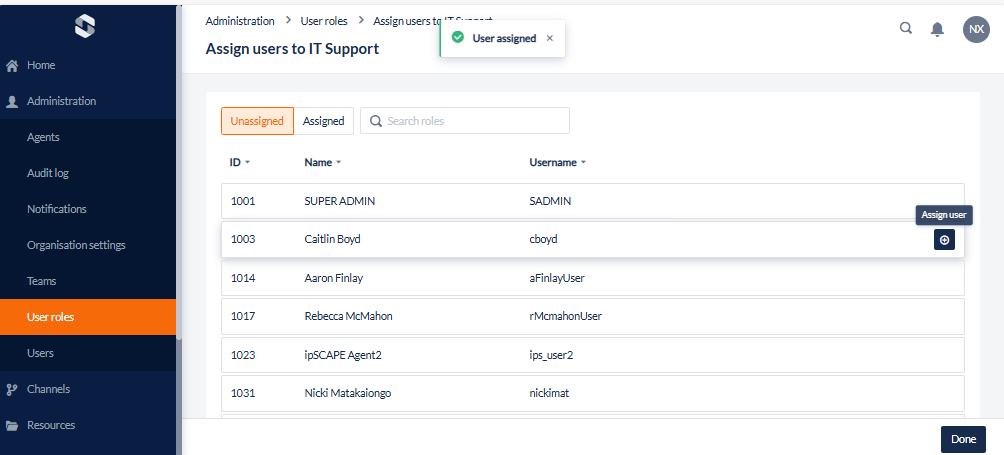
3. Assign Users to a Role
This feature is used to assign and unassign existing users to a User Role.
-
Open the Workspace.
-
Select User Roles from the Administration menu
-
Locate the Role from the list and click the Options icon to the right of the record and select Assign Users
-
Click the Unassigned button to show the list of unassigned users for the selected Role
-
Click the Assign User icon when hovering the mouse over a user or, to select multiple users, select each in the list and click the Assign icon at the top right
-
Once assigned, a confirmation message will show
4. Permissions Overview
Each module comes along with a set of permissions. You can select each section below to see what permissions are granted for each module.
Administration
View: Can access and see the front page of the module
Create: Can access, see and implement within the module
Edit: Can access, see, and edit existing records.
Delete: Can access, see, and delete existing records
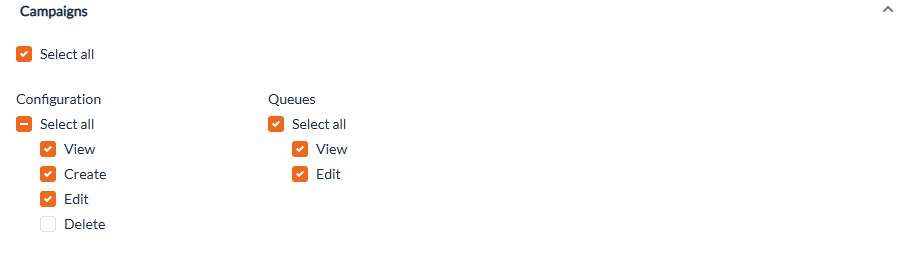
Campaigns
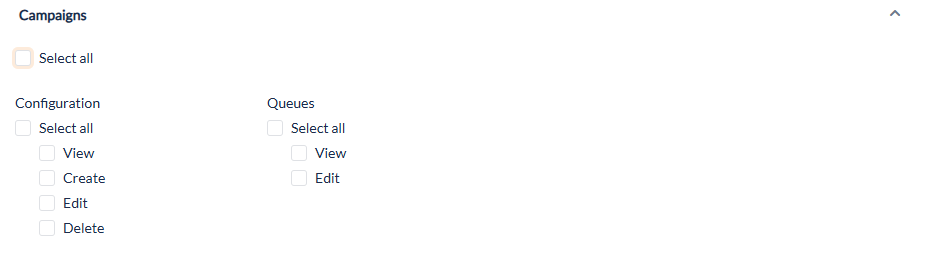
View: Can access and see the front page of the module
Create: Can access, see and implement within the module
Edit: Can access, see, and edit existing records.
Delete: Can access, see, and delete existing records
Channels
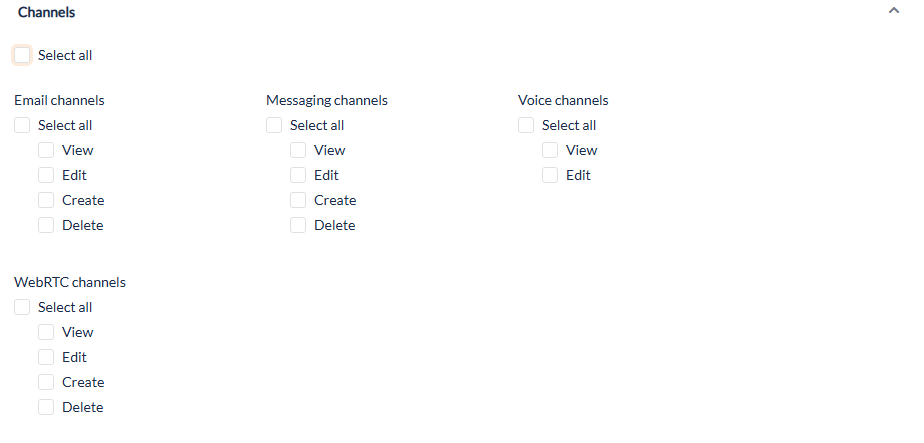
View: Can access and see the front page of the module
Create: Can access, see and implement within the module
Edit: Can access, see, and edit existing records.
Delete: Can access, see, and delete existing records
Integration
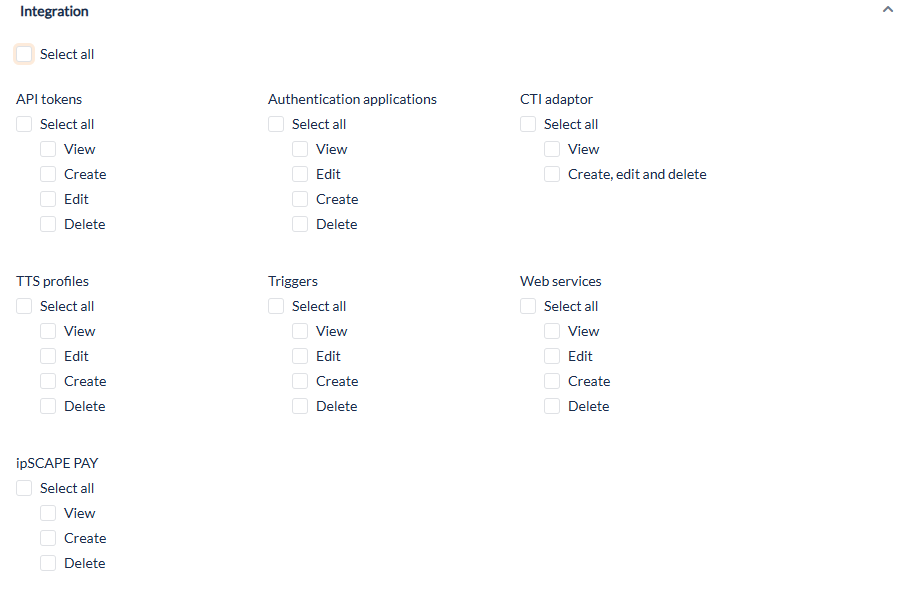
View: Can access and see the front page of the module
Create: Can access, see and implement within the module
Edit: Can access, see, and edit existing records.
Delete: Can access, see, and delete existing records
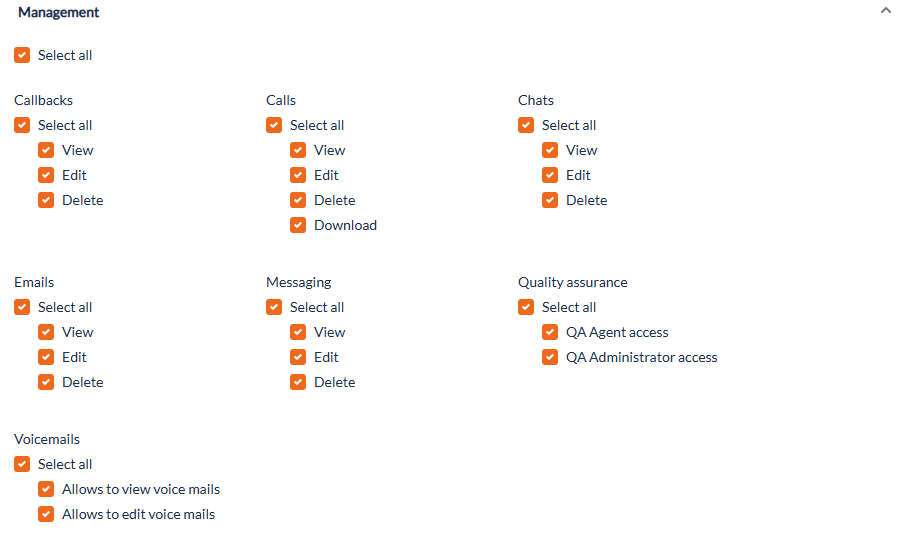
Management
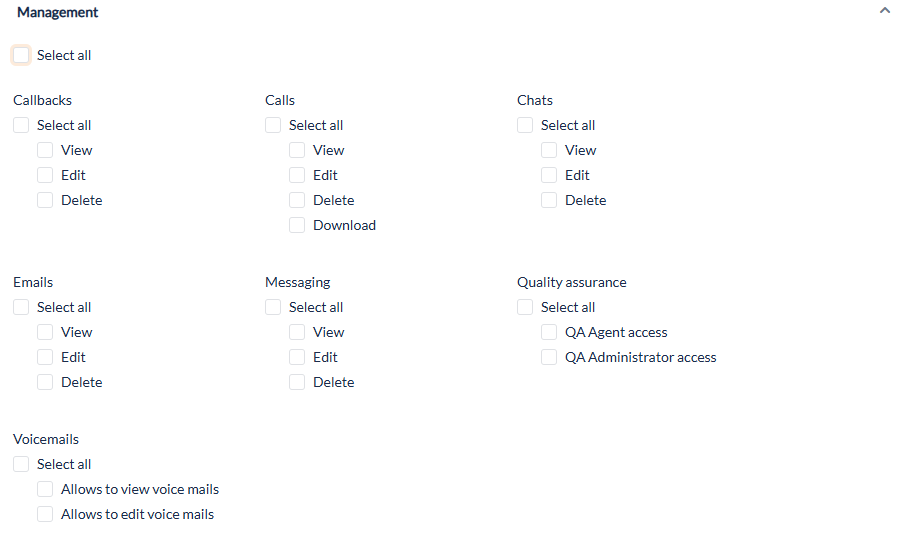
View: Can access and see the front page of the module
Create: Can access, see and implement within the module
Edit: Can access, see, and edit existing records.
Delete: Can access, see, and delete existing records
QA Agent Access: Provides access to the Quality Assurance module to review assigned calls.
QA Administrator access: Provides access to the Quality Assurance module and permission to assign calls to QA Agents.
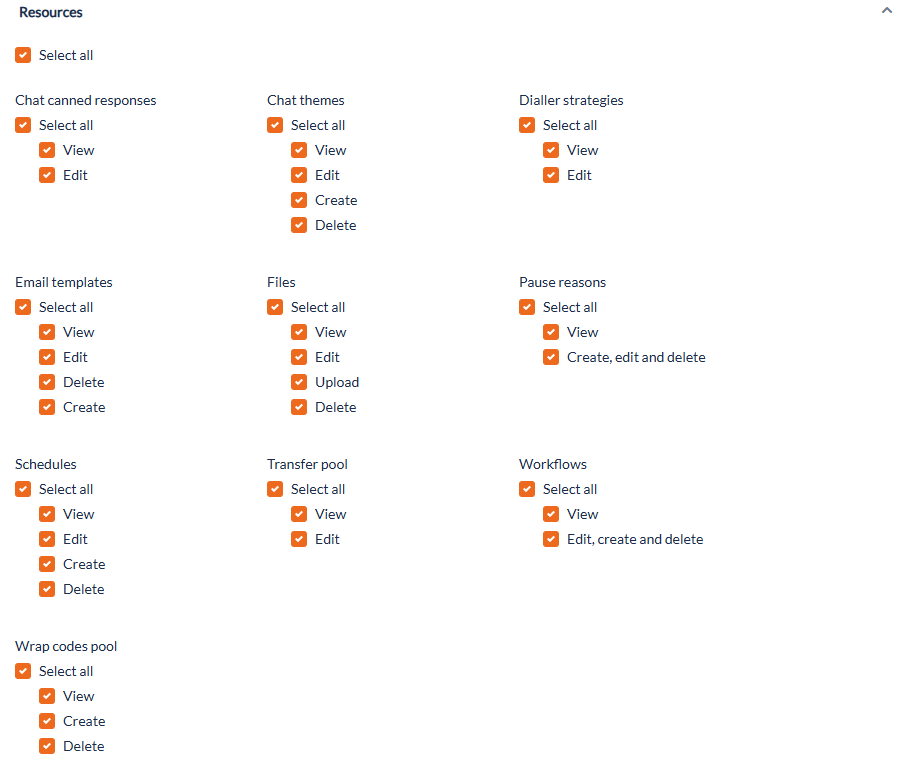
Resources
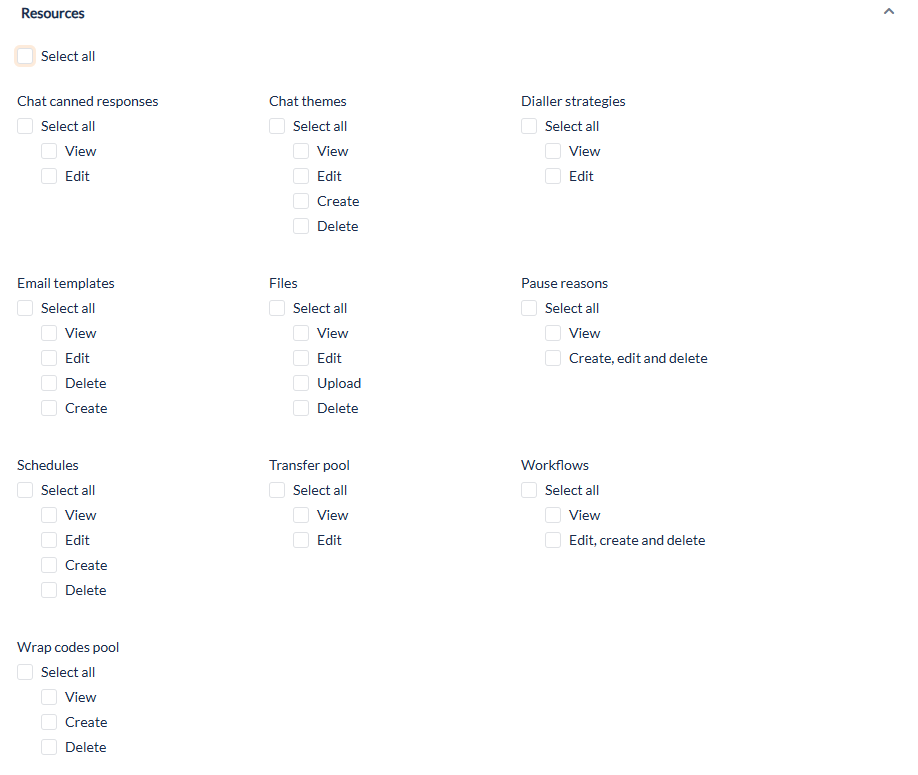
View: Can access and see the front page of the module
Create: Can access, see and implement within the module
Edit: Can access, see, implement and make changes to existing records.
Delete: Can access, see, implement, make changes to and delete existing records
Extras

View: Can access and see the front page of the module
Create: Can access, see and implement within the module
Edit: Can access, see, implement and make changes to existing records.
Delete: Can access, see, implement, make changes to and delete existing records
Due to the Design of some modules, some permissions are grouped, e.g. “Edit, create and delete”.
User Role Examples
All Organisations are different, and user role permissions may vary depending on responsibility. Please click on some examples below that may be useful.
IT Team
An IT support user may require access to all modules to support all other users within the organisation, so it may be best to provide full permissions to this role. You can simply do this by selecting SELECT ALL in each section of the permissions.
Management Team
A Management team may need to onboard new staff, create campaigns, set up inbound call Workflows, make changes to increase performance and generate reports for KPI’s, etc. however may not need access to external integrations better managed by the IT team. See an example of a management setup below:
Administration:
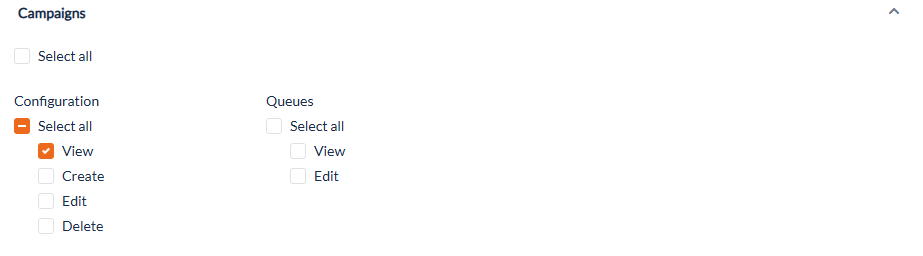
Campaigns:
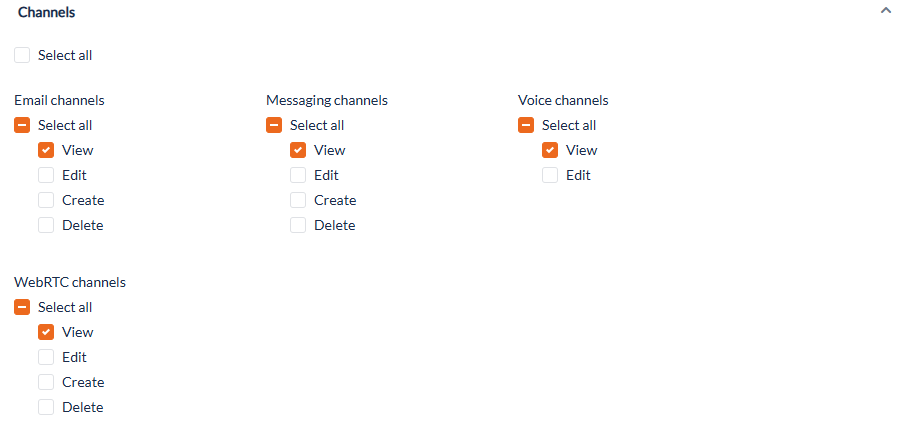
Channels:
Integrations: No Access
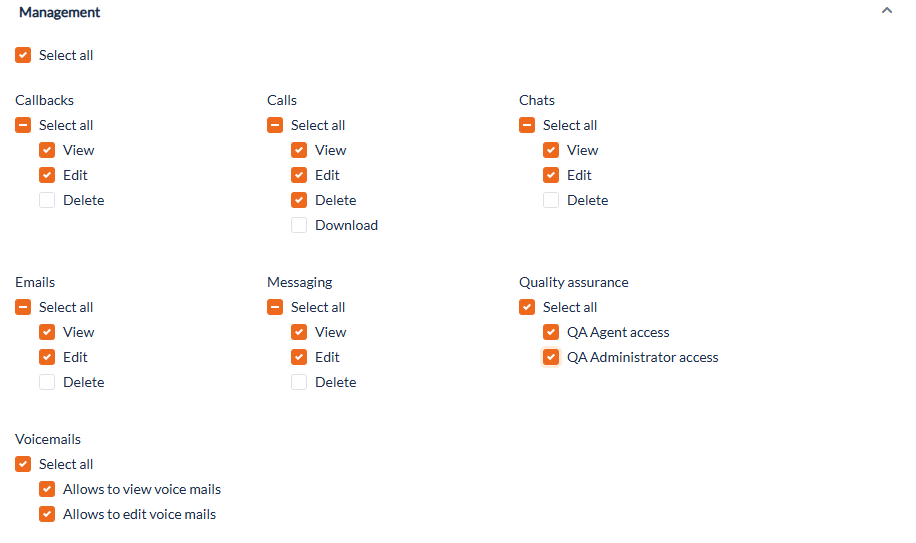
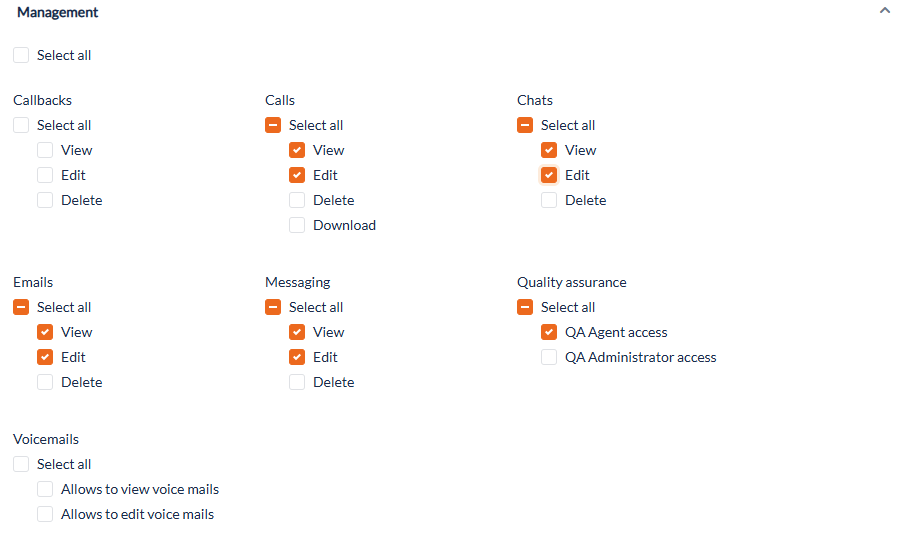
Management:
Resources:
Extras:

Team Leaders
A Team Leader’s responsibilities may be specific to managing only a portion of a department, so their access to the IPscape Workspace may be limited. See a User role example below:
Administration:
Campaigns:
Channels:
Integration: No Access
Management:
Resources: No Access
Extras:

Quality Assurance
A Quality Assurance Agent will only need access to a few of the modules with limited permissions. See a Quality Assurance Agent set up below:
Administration:
Campaigns:
Channels: No Access
Integration: No Access
Management:
Resources: No Access
Extras: No Access