Teams
Overview
A Team is a group of Agents and Users that perform similar functions, e.g. work on the same campaign, and can be assigned to the same Team. A Team can be Public or Private. By default, any new Team created is Public until such time as the User changes its permission.
Public teams are visible to everyone, if the User has permissions granted for the Teams module.
Private Teams are only visible to Users and Agents in that team.
Where to find the Teams module
Open the Workspace and go to the Administration menu.
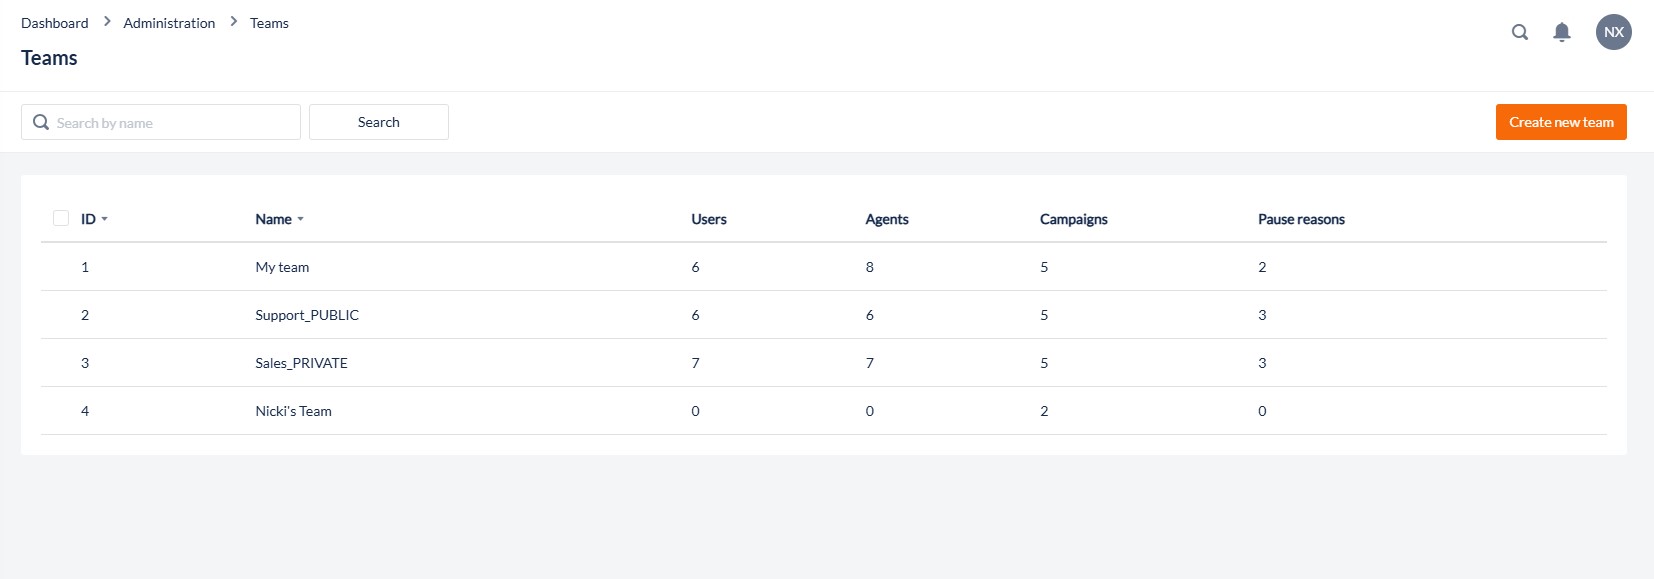
Select Teams. The list of Teams is displayed.

1. Add or Edit a Team
This feature is used to create and configure a new Team or to edit existing ones.
Open the Workspace.
Select Teams from the Administration menu
To create a new Team,
click the Create new team button
Enter the Team Name and select if the Team is to be made public or private
Click Save and assign to move to the Assignments page
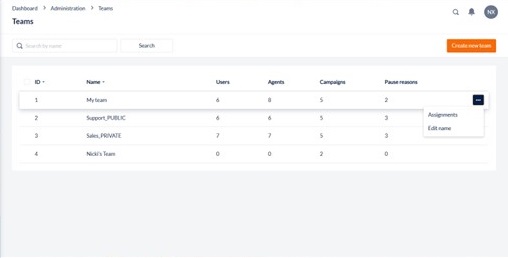
To edit an existing Team, click the Options icon to the right of the record which the mouse is hovered over it,
Click Edit name to change the name or visibility setting
Click Assignments to edit the Users, Agents, Campaign or Pause Reasons assigned to the Team
2. Team Assignments
This feature is used to assign users, agents, campaigns, and pause reasons to a Team. When creating a new Team this will be displayed after creating the Team. To edit an existing Team assignment, click the Options icon to the right of the record in the list.

View and Make Team Assignments
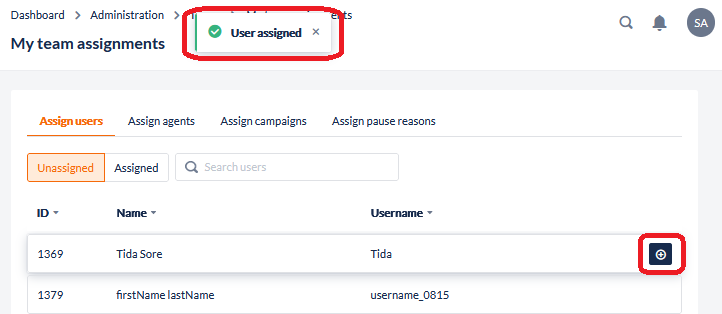
To view and make assignments to a Team, select whether it is a User, Agent, Campaign, or Pause Reason from the tabs at the top and select the Unassigned button to show anything not assigned to that Team. Hover over the record in the list to assign and the Assign icon will appear. Once assigned, a notification will appear to confirm it was successful.

View and Remove Team Assignments
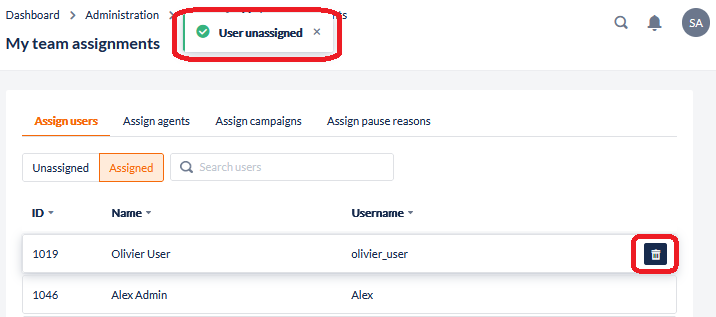
To view and remove assignments to a Team, select whether it is a User, Agent, Campaign, or Pause Reason from the tabs at the top and select the Assigned button to show anything assigned to that Team. Hover over the record in the list to unassign and the Remove icon will appear. Once unassigned, a notification will appear to confirm it was successful.

