Overview
Used in conjunction with the Apply Schedule workflow object, the Schedules module allows you to create and maintain working schedules for your campaigns. The Apply Schedule workflow object will check the selected schedule and return a result of in hours or out of hours; you can then decide how you want calls treated for both results by adding the appropriate objects in the workflow.
-
Open the Workspace
-
Select Schedules from the Resources menu
1. How to use Schedules
It is a good practice to create a Schedule Check Workflow as a stand-alone workflow that can then be cloned and used as the beginning of subsequent workflows
A typical Schedule Check Workflow contains the three Apply Schedule workflow objects that check the following schedules:
-
Emergency Schedule
-
Public Holiday Schedule
-
Business Hours Schedule
Contact the ipSCAPE Service Desk if the New Create Schedule button does not appear in the top right-hand corner of the screen.
2. Create an Emergency Schedule
-
Resources > Schedules > Create New Schedule – Name your schedule Emergency & leave all calendar entries blank
-
To invoke an emergency, edit the schedule and add a beginning and end time
-
All workflows that check the Emergency Schedule will route calls based upon the In Hours result whilst the emergency is in place
3. Create a Public Holiday Schedule
-
Resources > Schedules > Create New Schedule – Name your schedule Public Holiday & leave all calendar entries blank
-
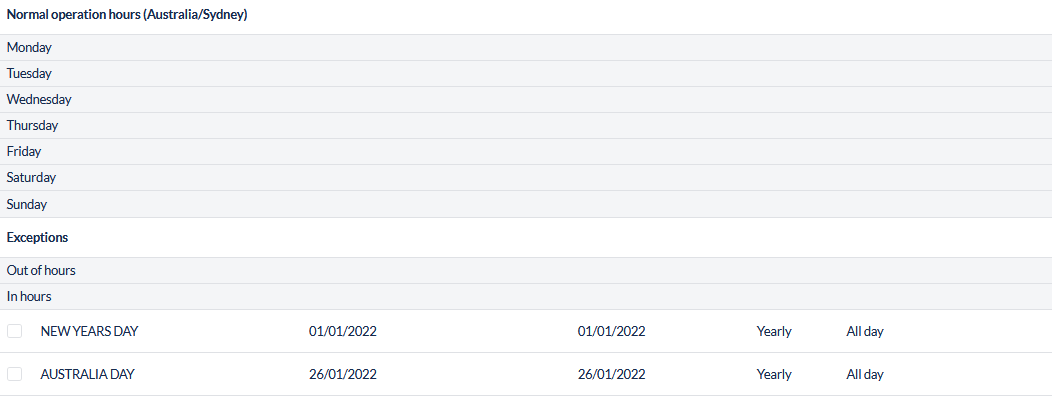
Program public holidays in advance as Exceptions (in hours) for the appropriate public holiday days
-
Where the public holiday may change from year to year, enter the dates as Fixed (for example Easter public holiday dates may vary from year to year)
-
Where the public holiday date remains the same each year enter the dates as Yearly (for example Christmas or Boxing Day)
4. Create a Business Hours Schedule
-
Resources > Schedules > New Schedule – Name your schedule Calendar or Business Hours for example.
-
Enter the open hours for your contact centre, or those campaigns that will use this schedule.
5. Add or Edit Operational Hours and Exceptions
The Operational Hours feature allows you to maintain schedules that define the working hours for your multiple campaigns.
Schedule Exceptions allow you to add or maintain exceptions to the working hours for your multiple campaigns. Such exceptions might include public holidays, office shutdowns, or weekly team meetings.
Exception (Out of hours) will follow the "Out Of Hours" branch on the "Apply Schedule Object" in the workflow, whereas Exception (In Hours) follows the "In Hours" branch.
-
Open the Workspace.
-
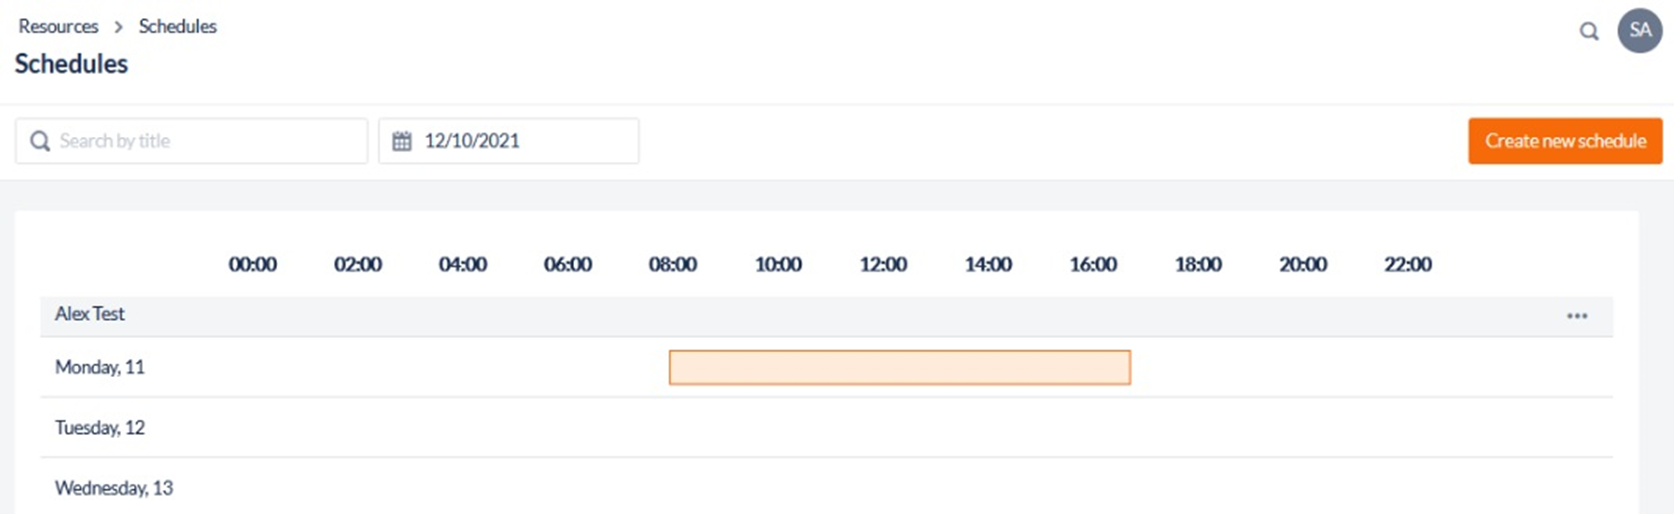
Select Schedules from the Resources menu.
-
To create a new schedule, click Create New Schedule. The Create New Schedule dialog opens.
-
To edit an existing schedule, click the Edit icon located in the breadcrumbs to the left of the selected schedule.
-
Add or Edit the schedule as described in the following table:
|
Field |
Description |
|---|---|
|
Title |
Enter a meaningful name for the schedule. |
|
Time Zone |
Select the time zone the schedule is running on |
Please note the Campaign time zone overrides the schedule time zone if the "Select Campaign" Object is used before the "Apply Schedule" Object in the IVR.
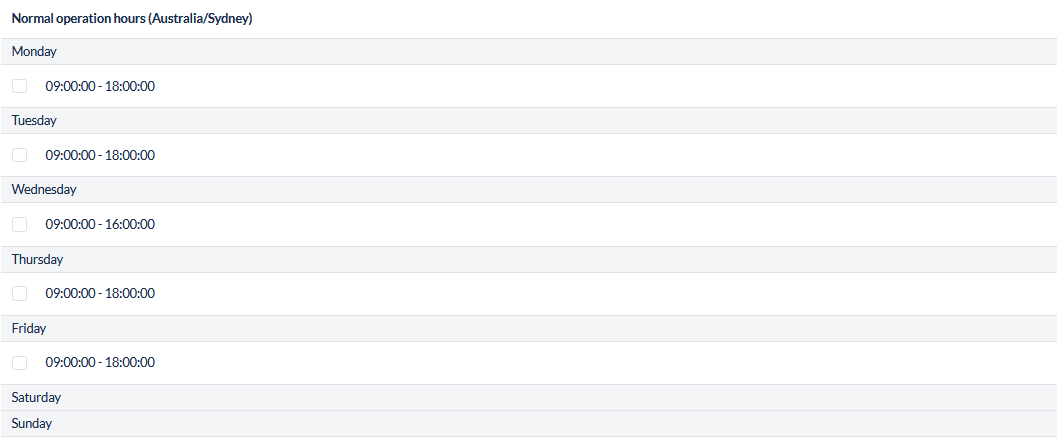
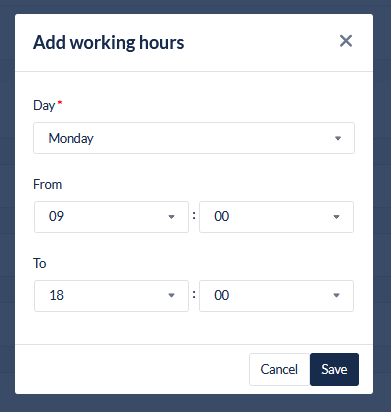
Add or Edit Working hours:
-
Select a Schedule to edit and click Add working hours button in the header
-
Select the Day and enter a Start and End time.
-
Click the Save button and repeat for each day
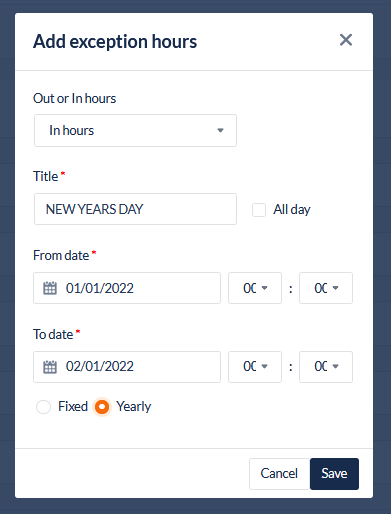
Add or Edit Exceptions (Out of hours) and Exceptions (In hours):
-
Select a Schedule to edit and click Add exception hours button in the header
-
Select if the exception is In or Out of Hours from the drop down
-
Enter a meaningful name
-
Enter the From and To date and time, or use the "All day" checkbox if desired, then only dates need to be entered.
-
Use the radio button to determine the occurrence (Fixed or Yearly)
-
Click Save