
SCIM - Identify Management with Okta
Overview
SCIM (System for Cross-domain Identity Management) is an open standard protocol designed to simplify the process of managing user identities and groups across multiple domains, systems, and applications.
The IPscape SCIM with Okta solution provides a standardised way to perform key identity-related operations such as user provisioning, de-provisioning, and managing user attributes, group memberships, and roles.
Advantages of SCIM
Simplifies User Management: SCIM streamlines identity management by providing a common protocol, eliminating the need to build custom connectors for each application.
Improves Security: Automating provisioning and de-provisioning processes ensures that access is immediately granted or revoked as necessary, reducing security risks from inactive accounts.
Scalability: SCIM is ideal for large organizations with complex identity needs, as it allows for scalable and consistent management of users across systems.
Interoperability: As an open standard, SCIM is widely adopted and supported by many identity providers and applications, ensuring seamless integration.
1. Prerequisites
To set up the link between IPscape and Okta, the following will be required:
Access to the IPscape Workspace Administration module.
OKTA administration knowledge and access
2. Okta SCIM Configuration
Below are the instructions on how to set up OKTA for IPscape:
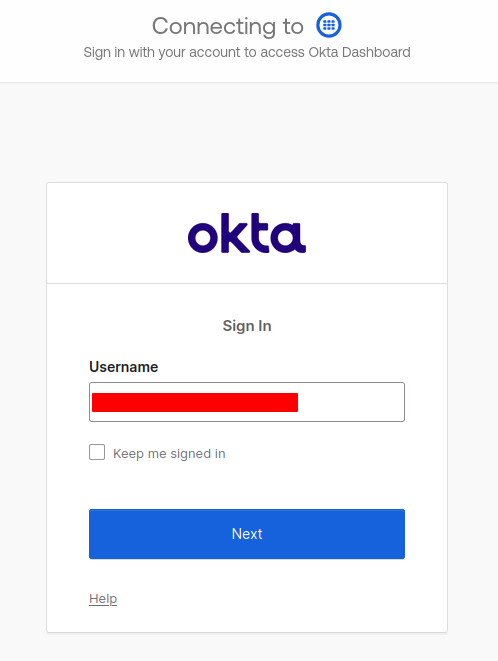
Sign into your Okta account as an Administrator
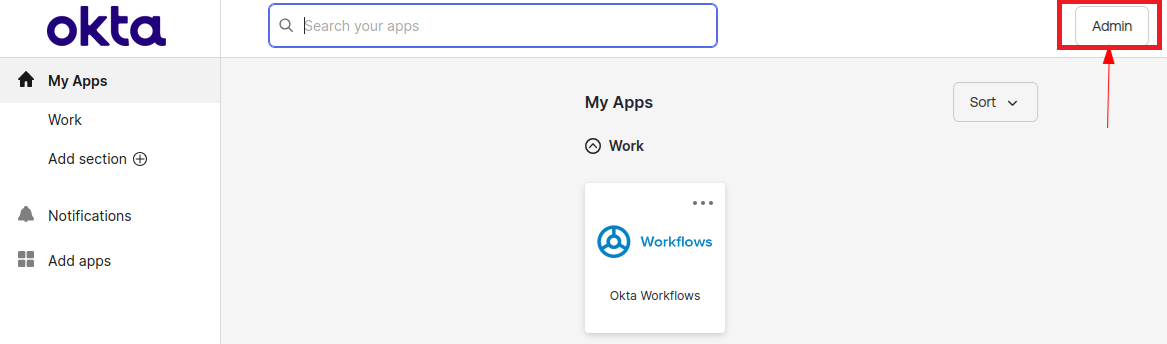
Select the “Admin” option located at the top right-hand side of the browser screen
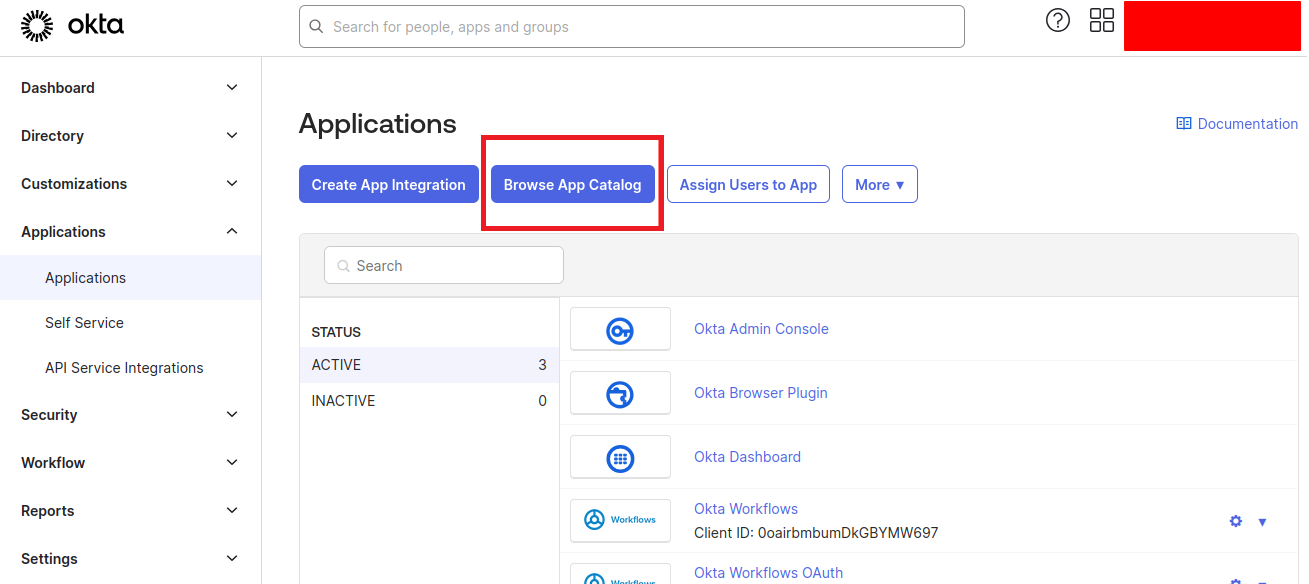
In the side menu bar select Applications followed by Applications

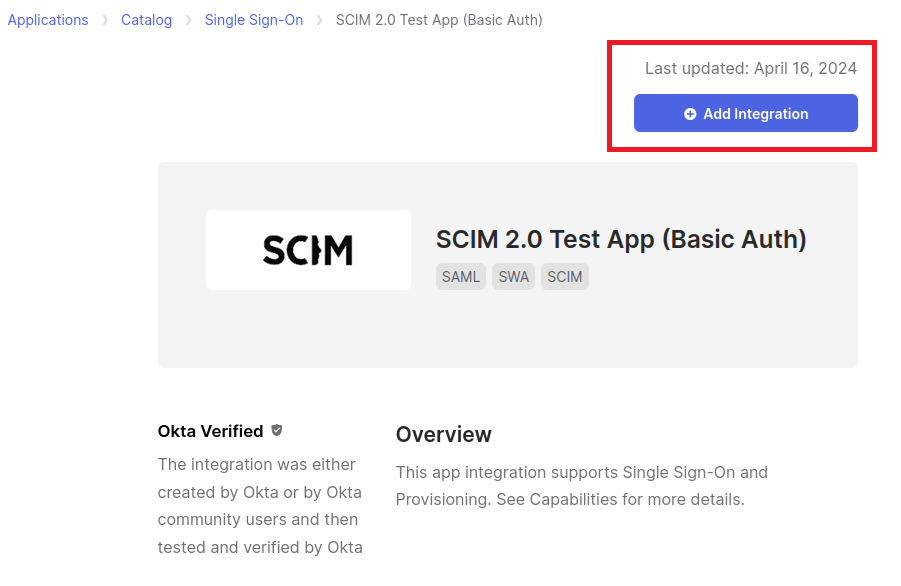
Select Browse App Catalog
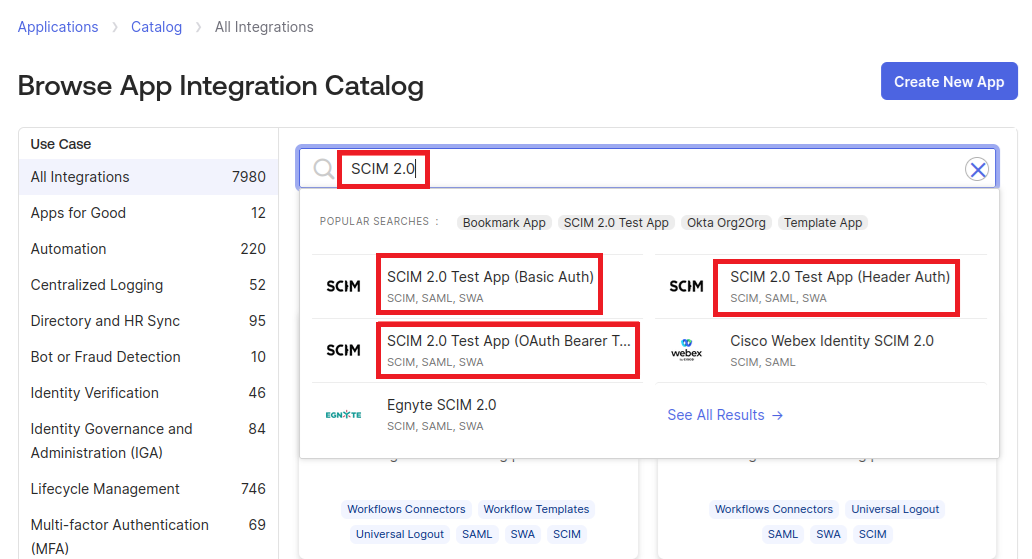
In the search bar, search for “SCIM 2.0”, You will see three Applications available for selection
Basic Auth
Header Auth
OAuth Bearer Token
It is recommended to select the “Basic Auth” or “OAuth Bearer Token”:
Once selected, click Add Integration - This should only take a few seconds
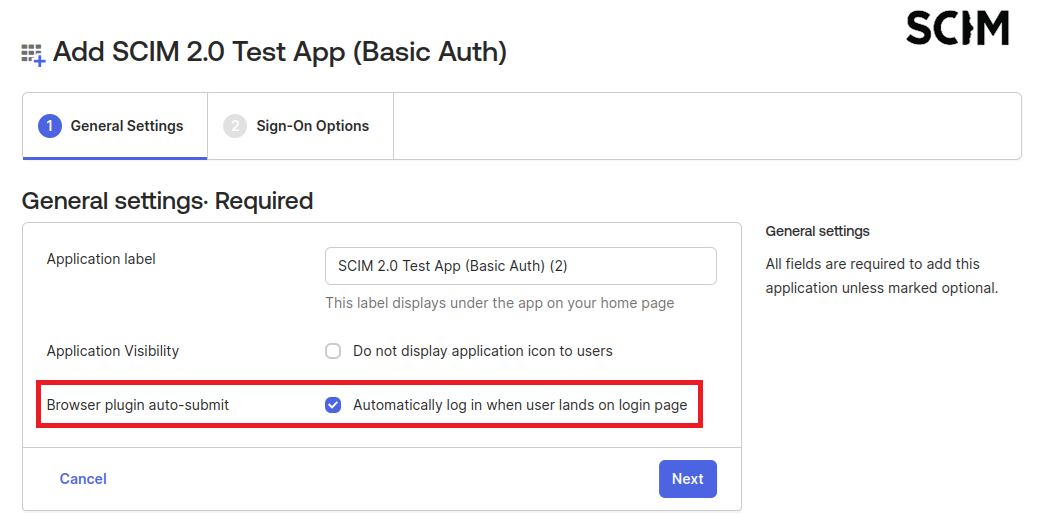
In the General Settings tab,
Provide a Name for your SCIM app, e.g. “SCIM IPscape”
Enable “Automatically log in when user lands on login page”
Click Next
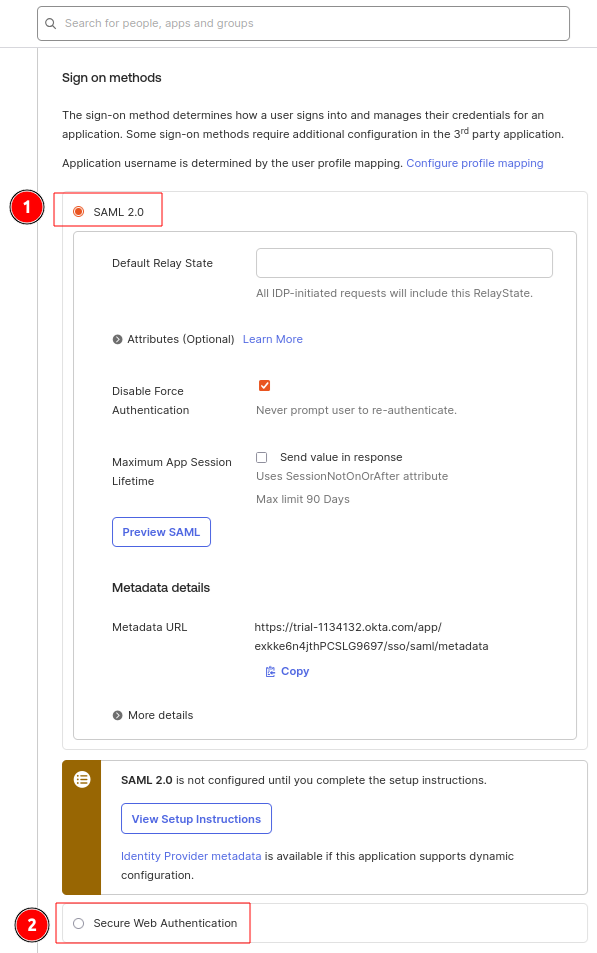
In the Sign-On Options tab
Select either SAML 2.0 [1] or Secure Web Authentication [2] (Secure Web Authentication is recommended)
Click Save.
3. IPscape Workspace SCIM Configuration
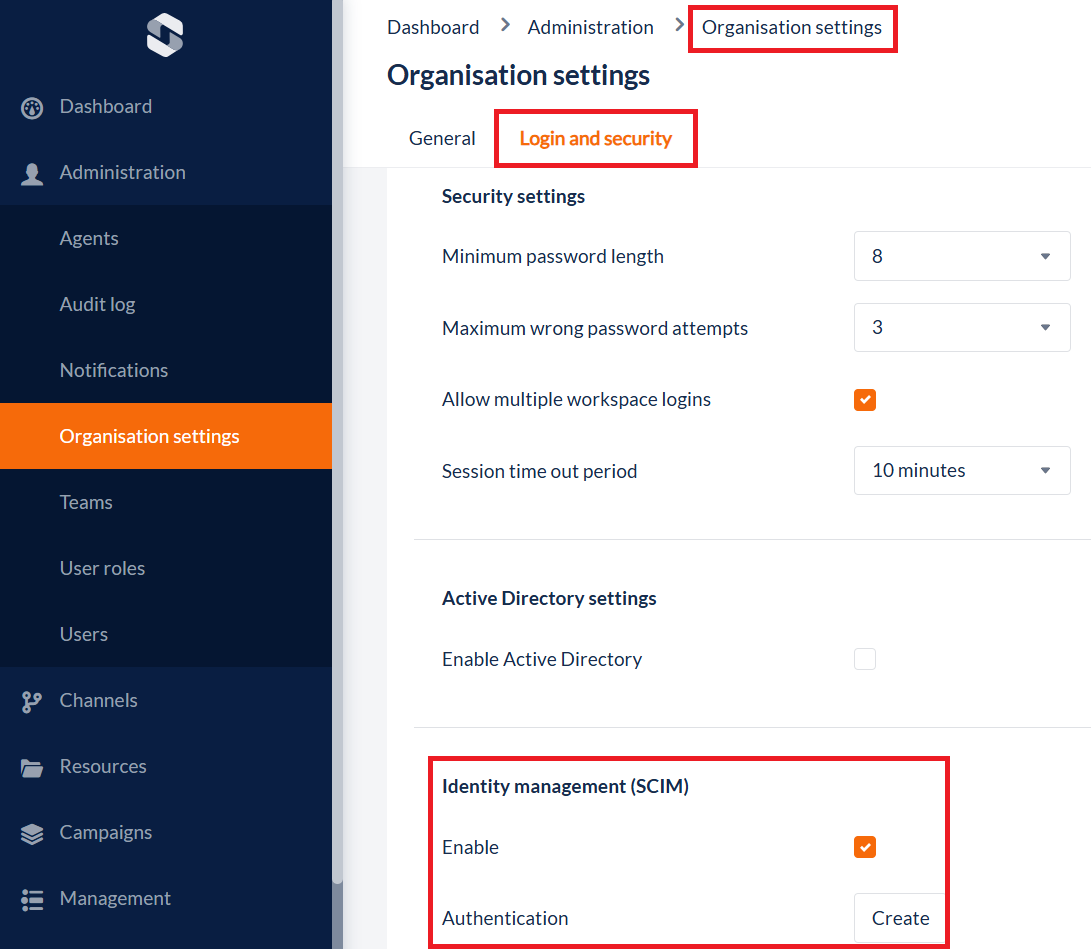
Under the Administration menu in the IPscape Workspace, open the “Organisation settings” module and select the “Login and Security” tab.
Under Identity Management (SCIM) select the tick box next to Enable
Select Create to setup authentication between SCIM and the IPscape Workspace
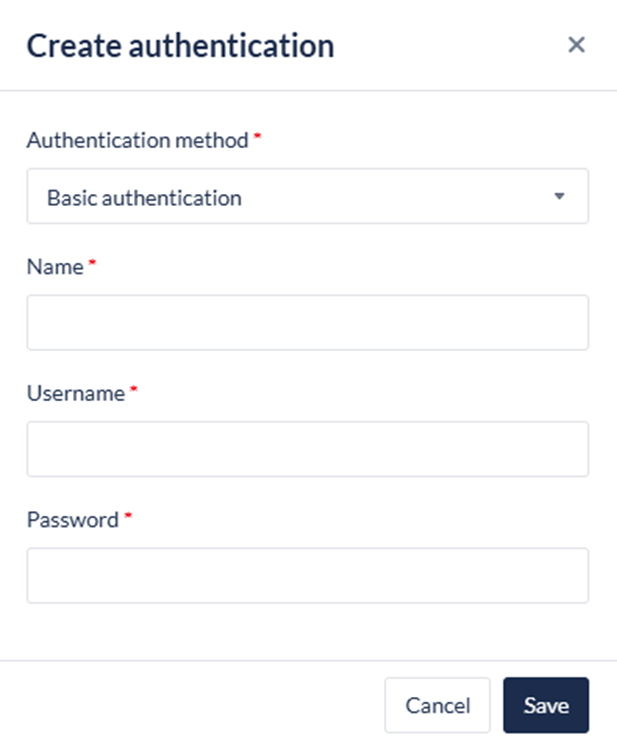
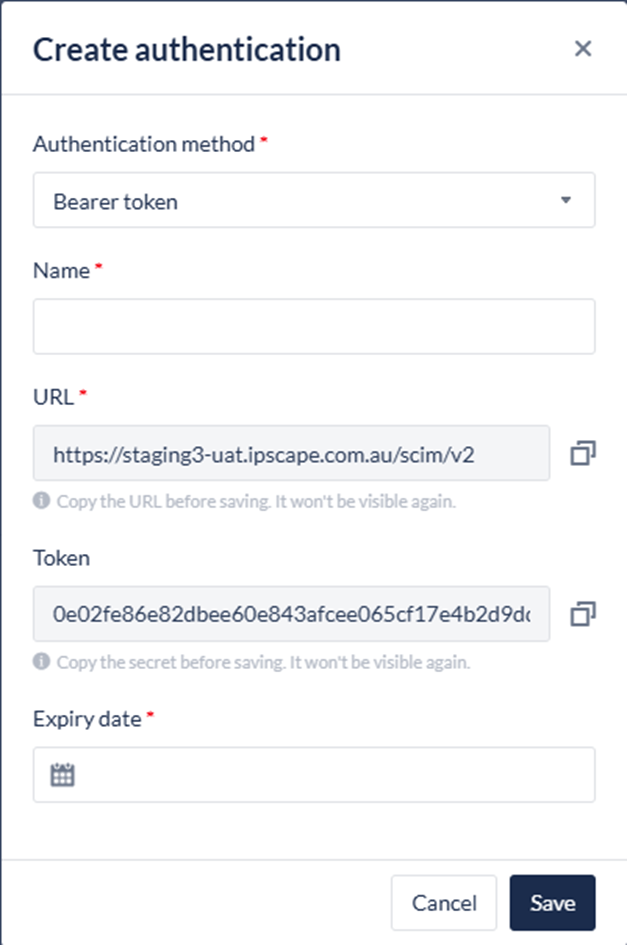
In “Create Authentication”, select an Authentication Method; Basic Authentication or Bearer token.
Bearer Token is recommendedBasic Authentication:
Name / Title
Username
Password.
Bearer Token:
Name
Copy the URL link and Token
Expiry date
Ensure to keep a copy of the URL link and token in a secure location as the token will only be displayed a single time when it is created.
A single tenant is only capable of making a maximum of two profiles.
Each profile must be of the same “Authentication Type”.
4. Provisioning Workspace Authentication in OKTA
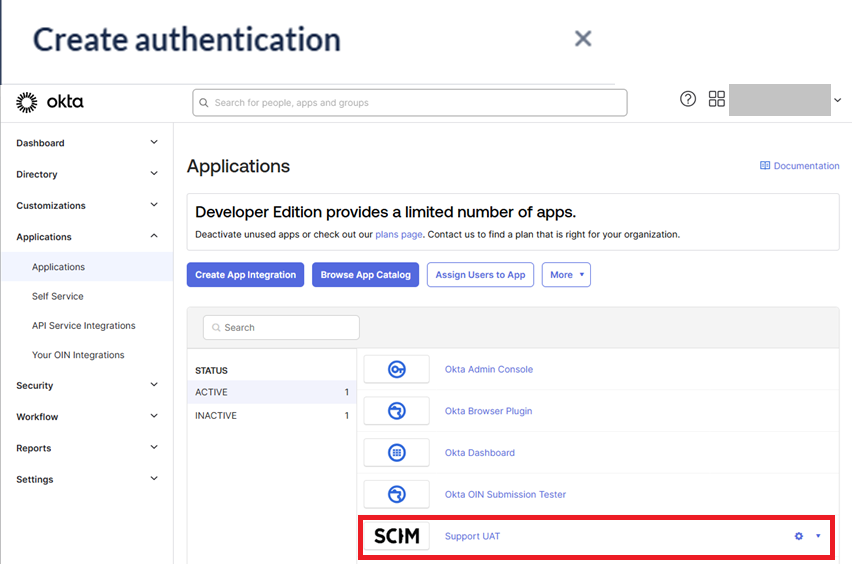
In the OKTA Applications menu, select Applications and click on the newly created SCIM Application
Select the “Provisioning” tab, then from the side menu in the app select “Integration”. This is where you will select Enable API Integration and enter the URL and Token saved earlier for the Bearer Token Authentication.
Then Press Test API Credentials and Save.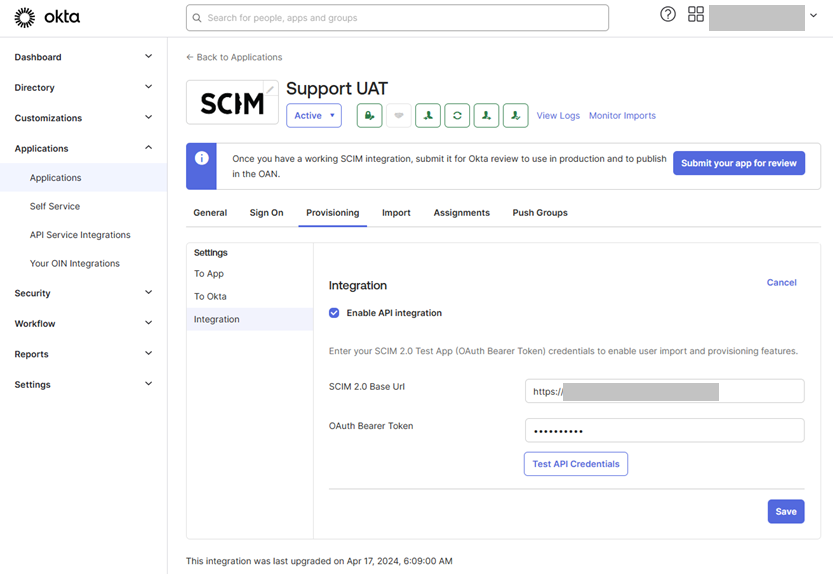
Provisioning the SCIM APP
While still in the provisioning Tab, select the “To App” option and then select Enable for all options and press save.
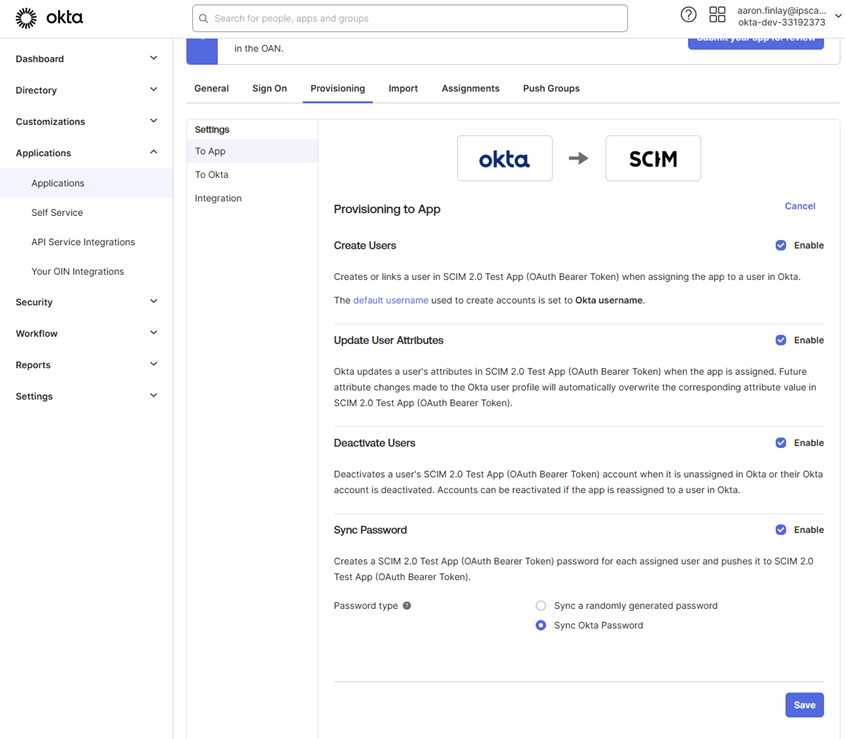
While still in the provisioning Tab, select the “To Okta” option. Changes here are only recommended for experienced Okta Admin personnel and made if required. Otherwise, nothing changes.

5. Adding Attributes and Mapping IPscape User, Agent and Teams Fields
There are 2 ways to implement the additional IPscape Mapping fields to Okta:
Manually – This method will take longer however ensures that all the fields are added without any disruption
Via API – This method is faster, however it is recommended that it be completed by an Okta Administrator with API expertise
Manual Field Mapping
Below is the manual method of adding Fields to Okta and the SCIM app:
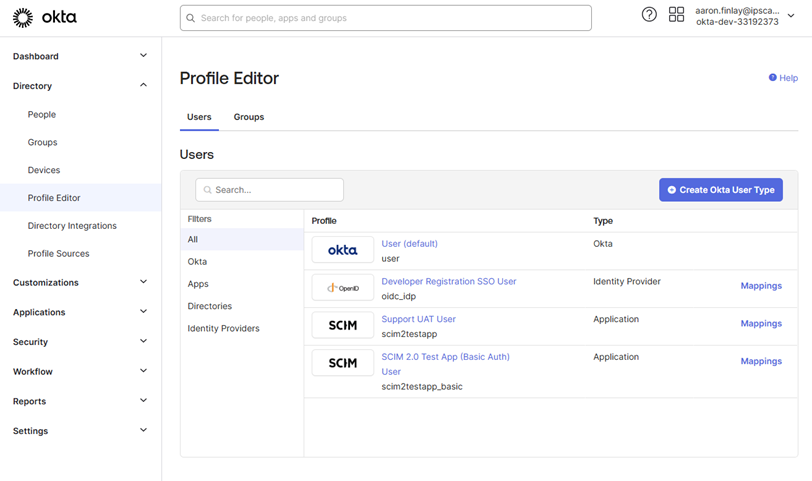
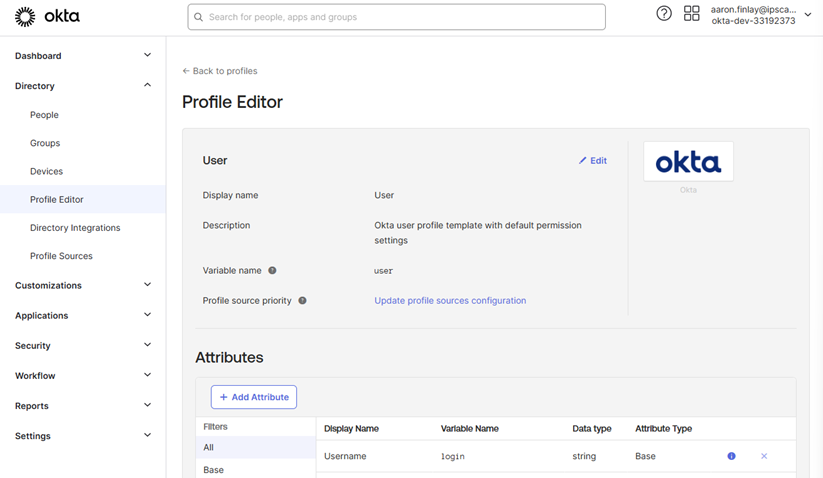
In Okta under the Directory Menu select the “Profile Editor” Module. Then select the User Default SCIM app
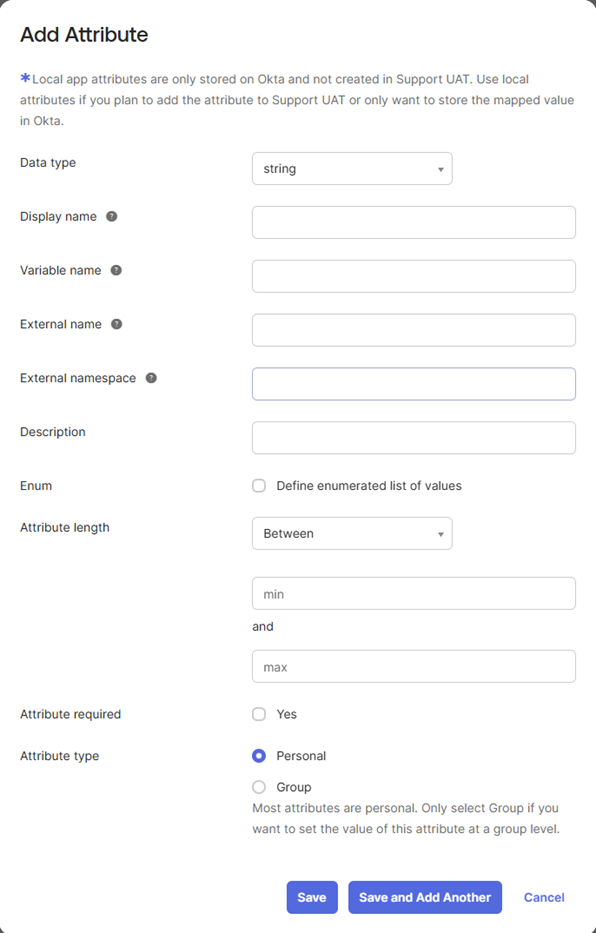
Select the “+Add Attributes” option
Once selected you will see the below Screen with multiple fields to fill in
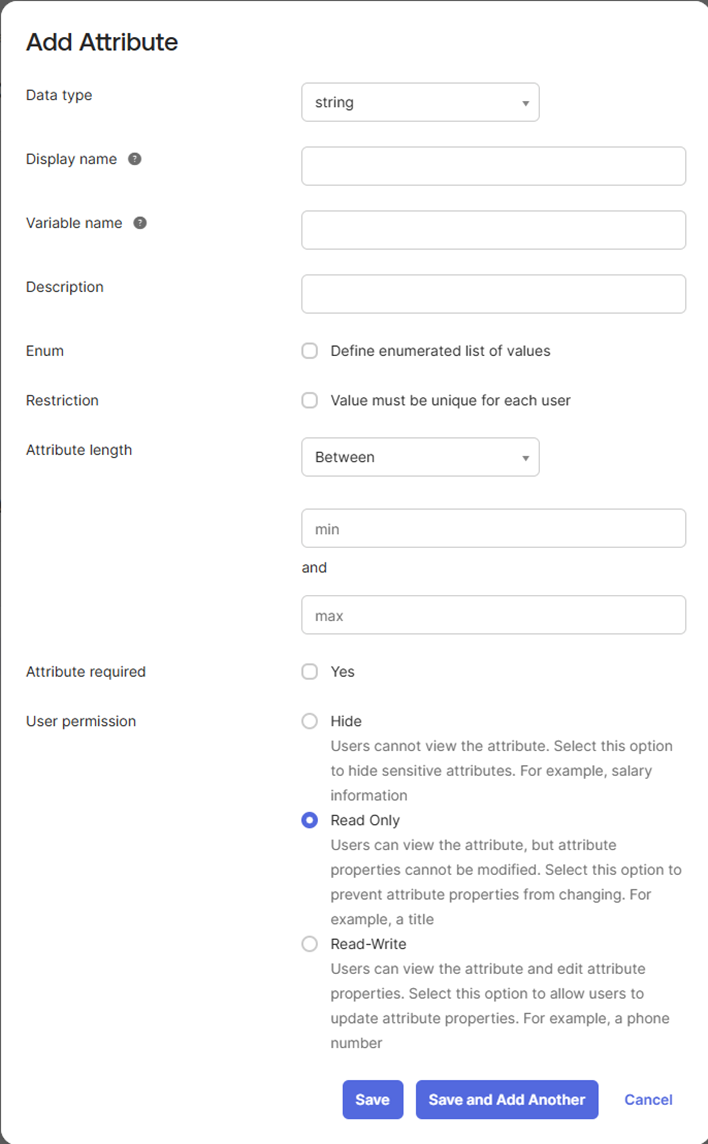
Field | Description |
|---|---|
Data Type | All of the IPscape fields are String, leave as is |
Display Name | This is the name of the Field e.g. Agent Username, Agent CLI |
Variable Name | This is the field name in camel case e.g. agentUsername, agentCli |
Description | Optional |
Enum | This is used for fields that have multiple choices, e.g. Agent Connection Method would have multiple options. See the example below: 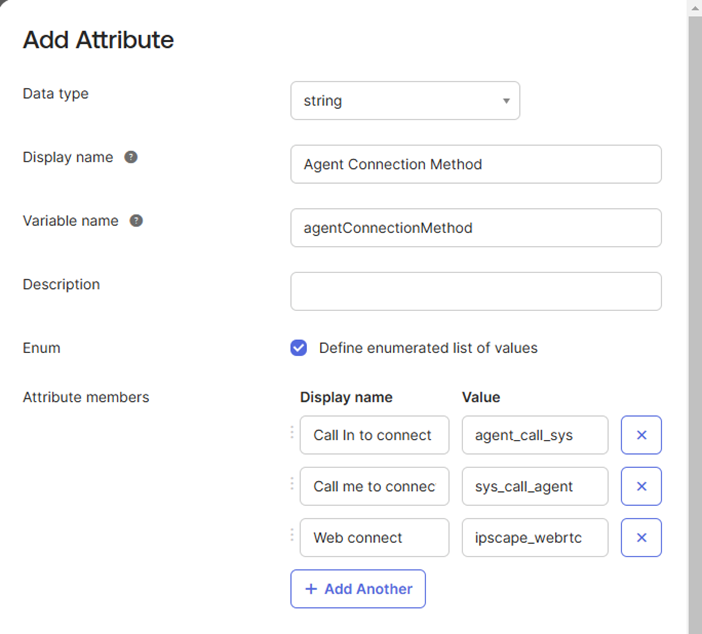 |
Restriction | Optional (not recommended) |
Attribute Length | This is if there is a character limit to the value |
Attribute Required | Optional (not recommended) |
User Permission | Hide is recommended |
For a full data dictionary of all the IPscape Fields advising of what is required for all fields, please reach out to IPscape Support
Once all of the IPscape Fields are added to the Default SCIM App, you will now need to do the same to the SCIM App created:
Field | Description |
|---|---|
External Name | This will populate itself |
External Namespace | This will relate to one of the below schemas you will see how these are mapped to the Fields in following link:
|
Attribute Type | Select Personal for all. |
Once all the fields have been added to the SCIM App you can now select “Mappings” while still in the SCIM App.
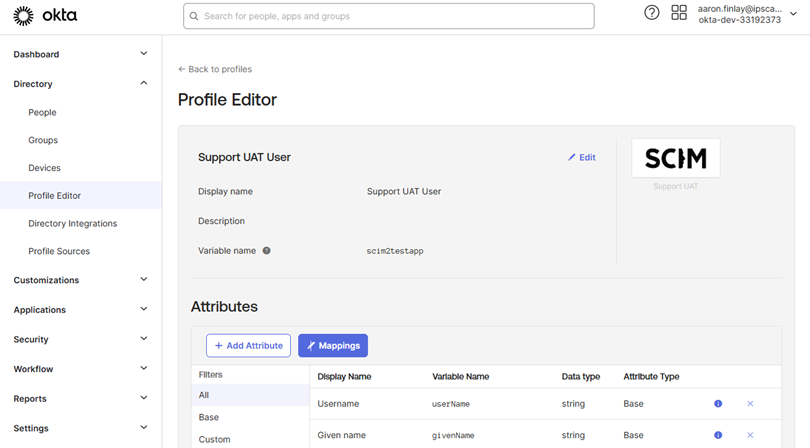
In the Mapping screen you should see “<your SCIM App Name> to Okta User” and “Okta User to <your SCIM App Name>”.
Under “<your SCIM App Name> to Okta User” you should see all of the IPscape Fields created on the right-hand side.
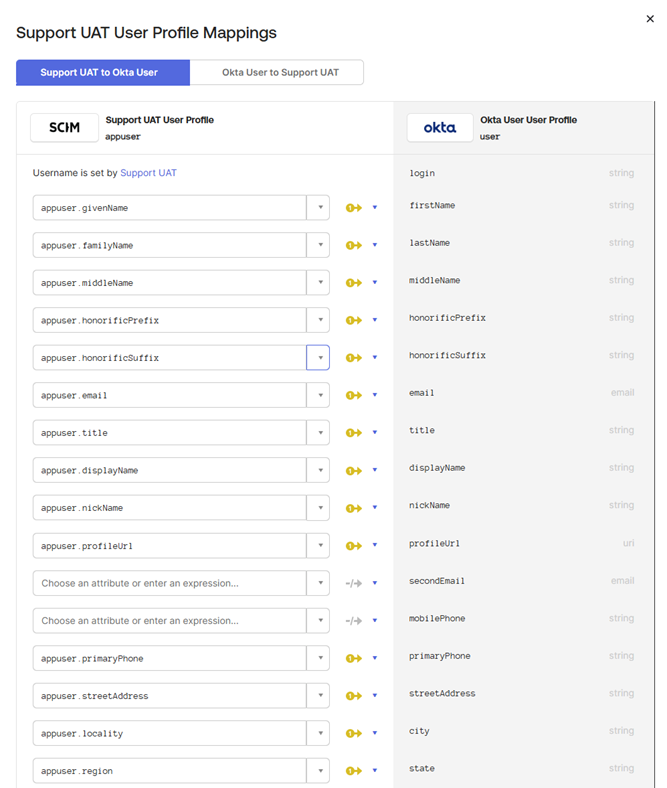
You will see all of the fields next to them on the left side saying “Choose an Attribute or enter in an Expression” - Enter the field to match like shown below and then press “Save Mappings”
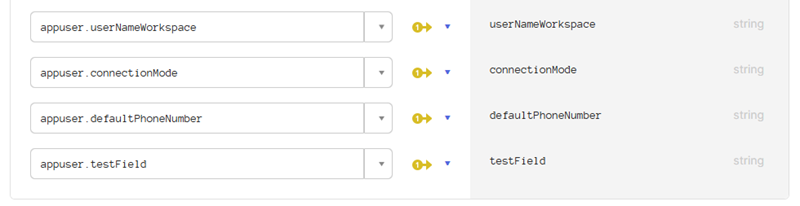
Once complete, select “Okta User to <your SCIM App Name>” and run the same process then press “Save Mappings”
Field Mapping by API
Please reach out to the IPscape Support team for further information on mapping via API