Agent Toolbar Troubleshooting Guide
Clear web browser cache and cookies
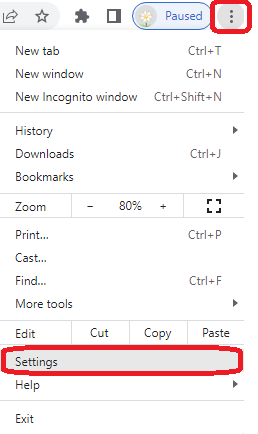
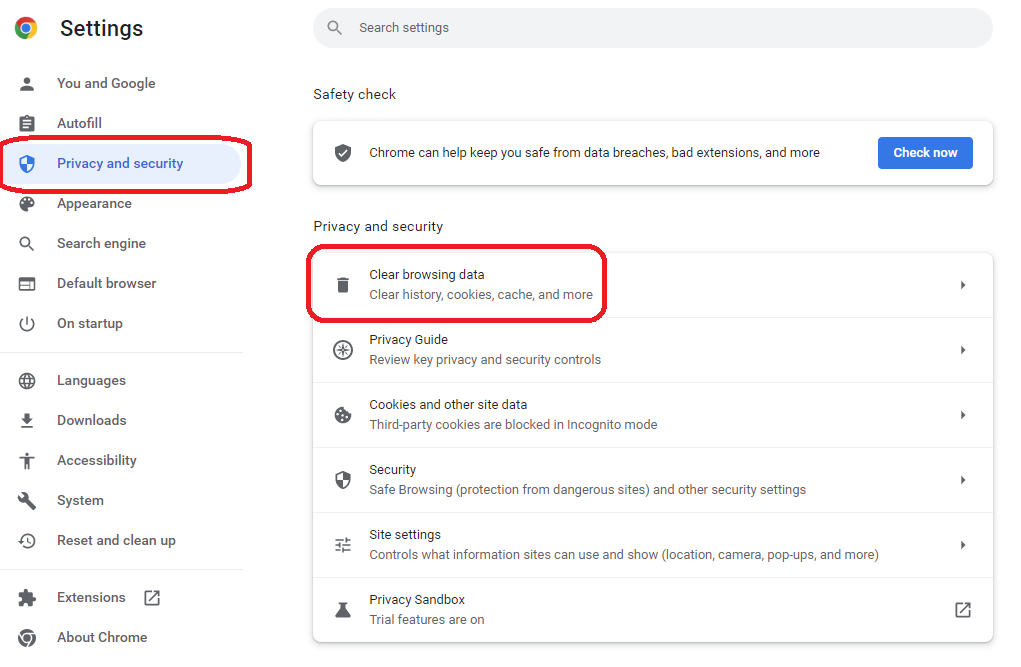
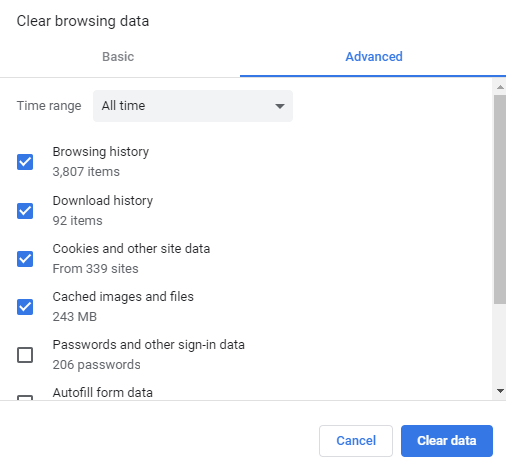
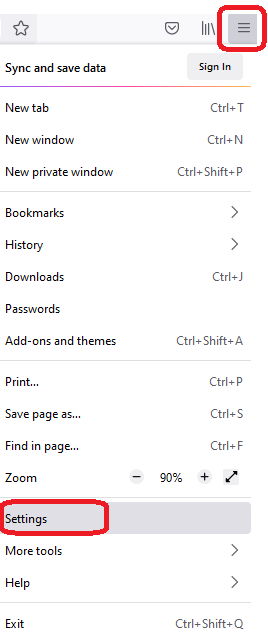
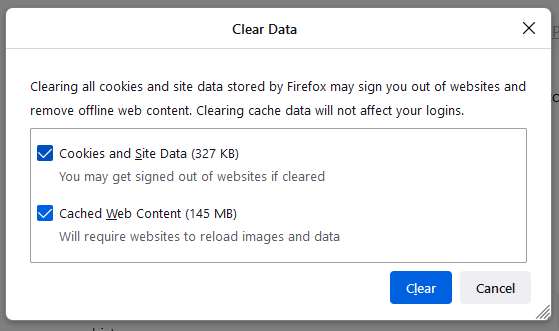
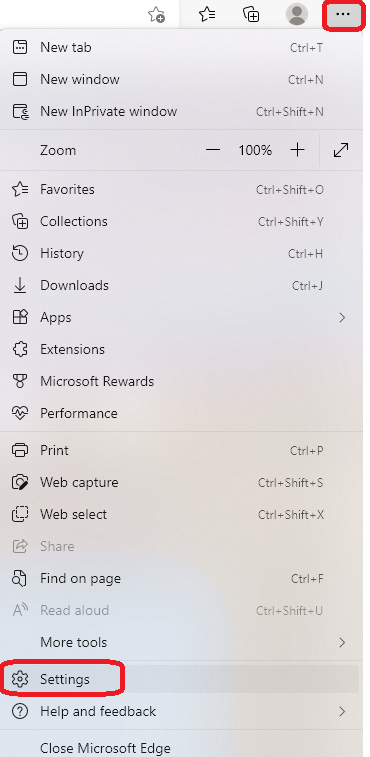
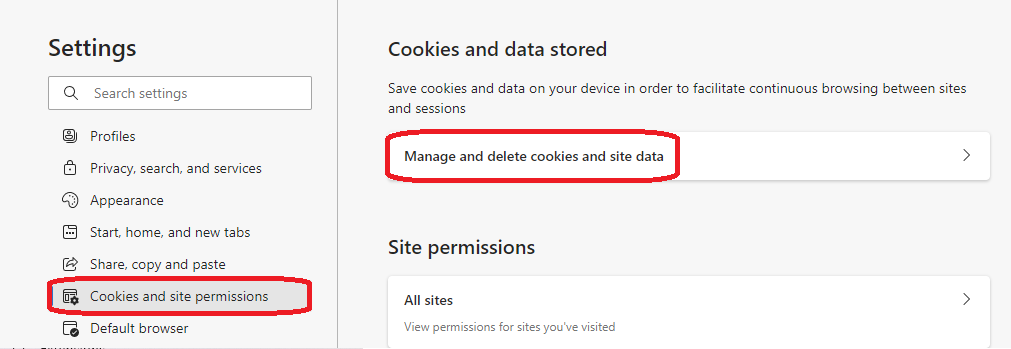
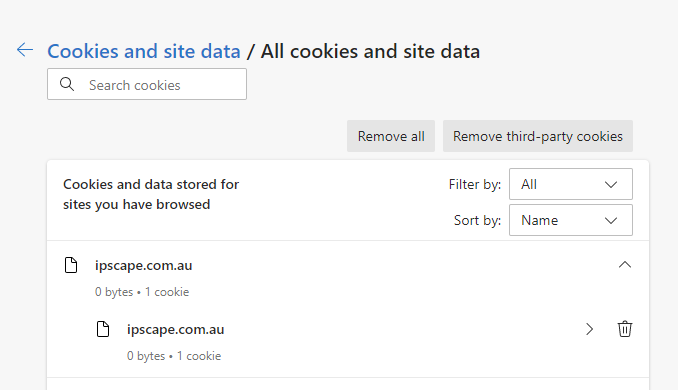
This guide will tell you how to clear your cache, cookies, and history for all of the widely-used and supported browsers. These supported browsers are Google Chrome, Mozilla Firefox, and Microsoft Edge.
What is a Browser Cache
To speed up browsing, web browsers save copies of website data to your computer as a set of files called a cache. When a website is loaded, users are often viewing a local copy of elements from the site (such as images) pulled from the cache.Normally, if the browser loads a website and detects a change, it will fetch a new version of the site from the remote web server and replace the cache however sometimes the browser may end up with a local copy of the website data in your browser cache that doesn’t match the latest version on the server. As a result, a web page may look incorrect or not function properly.
Why Clear Cache and Cookies
Clearing your cache and cookies is a good troubleshooting step when your browser has issues. The 'cache' is a tool used to help speed up the page loading process. However, sometimes it can cause a problem when websites are updated and developed as files saved in the cache may conflict with what's actually coded into the website. Clearing Cache and Cookies is a way we can be sure that any issues you may come across are actually something wrong with the website, rather than inconsistencies caused by using different browsers.
Keyboard Shortcuts
If you are using Internet Explorer, Microsoft Edge, Firefox, or Chrome, you can use Ctrl + Shift + Delete (Mac: ⌘ + Shift + Delete) to quickly bring up the window to delete the cache and/or cookies.
Instructions for each browser are detailed below (click the section to expand):
Be sure to close and restart your browser after clearing the cache/cookies for best results.
Clear only ipSCAPE site data (Hard refresh)
A hard refresh clears a browser cache for a specific page, which forces it to load the most recent version of that page. This could include new scripts, styles or features.
Clicking the "Refresh" icon on the browser address bar is not a hard refresh. Here's how the cache can be cleared through a hard refresh on supported browsers:
Google Chrome
Windows users: hold down Ctrl and then press F5 on the keyboard
Mac users: hold down Cmd and Shift and then press R on the keyboard
Mozilla Firefox
For Windows users: hold down Ctrl and then press F5 on the keyboard
Mac users: hold down Cmd and Shift and then press R on the keyboard
Microsoft Edge
Hold down Ctrl and then press F5 on the keyboard
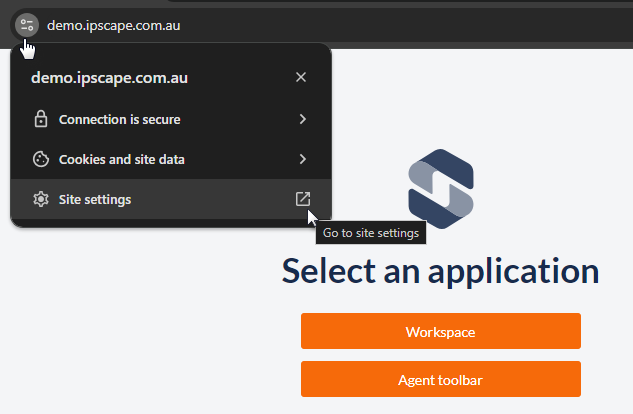
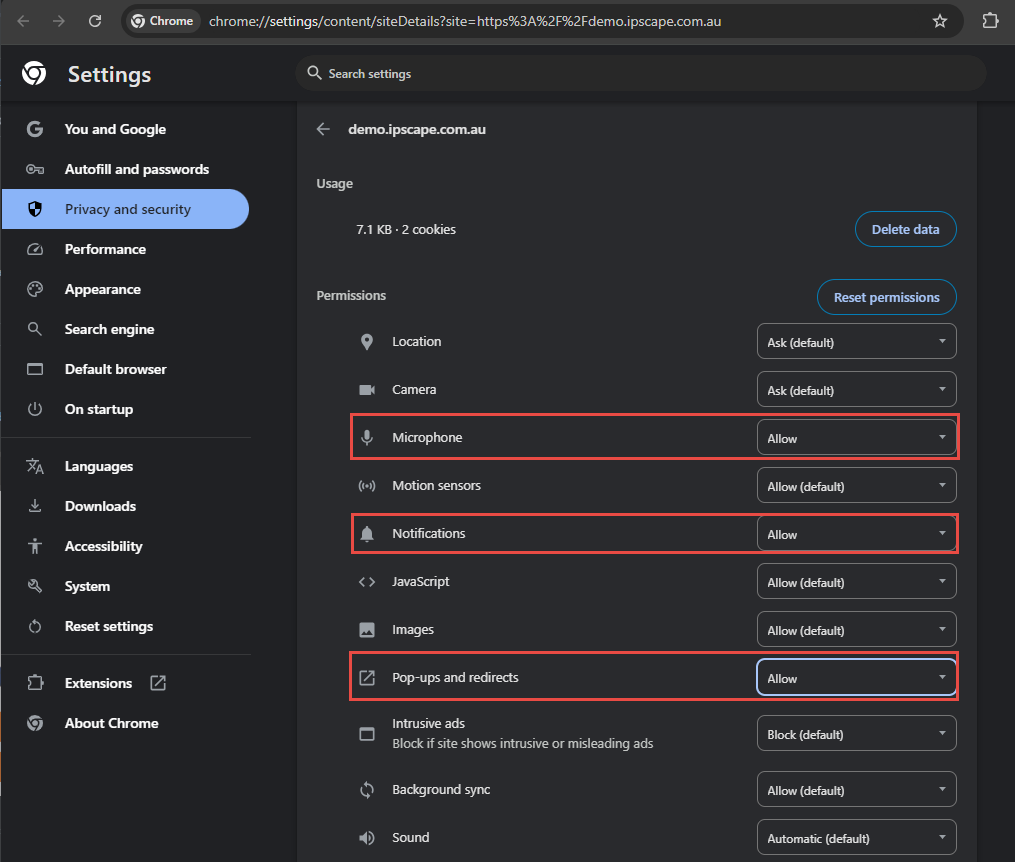
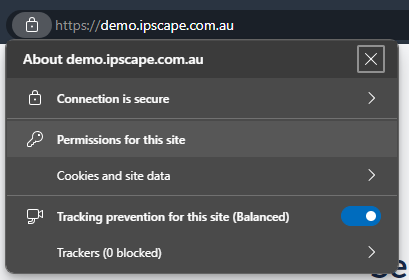
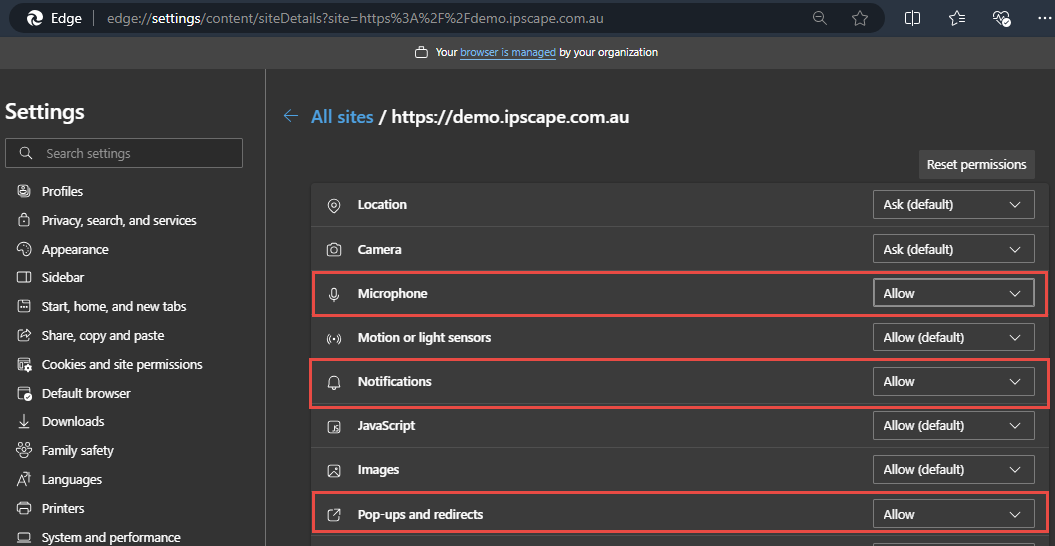
Adding site permissions
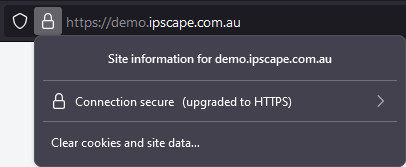
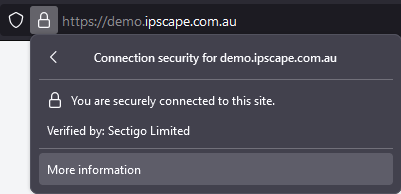
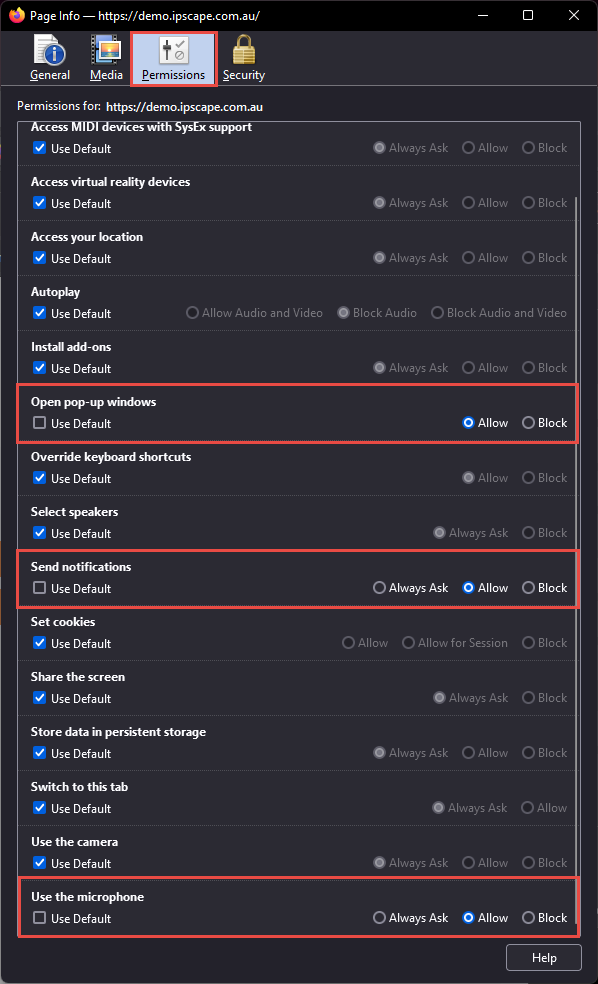
This guide will show you how to configure the necessary settings for ipSCAPE without altering the default browser settings, ensuring that all features work correctly across widely used and supported browsers.
What are site permissions?
These permissions grant access to specific features of the user’s device, such as location, camera, or microphone. ipSCAPE only requests the essential permissions and places a high priority on protecting confidential data and client security.
Google Chrome Incognito does not show Notifications and cannot be reconfigured otherwise.
Updating web browser
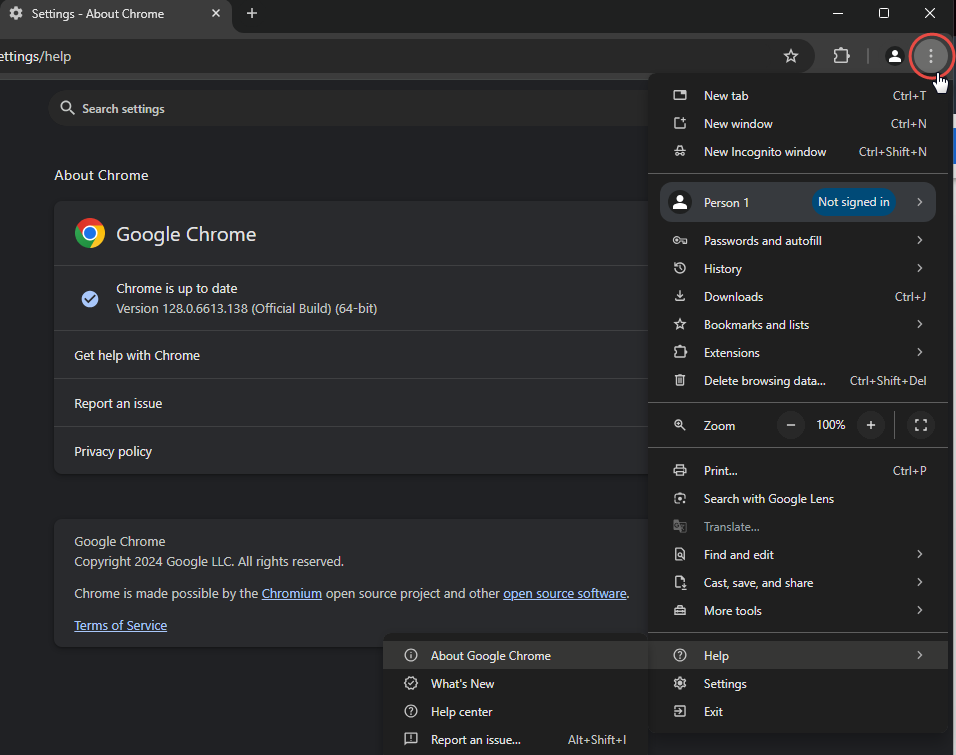
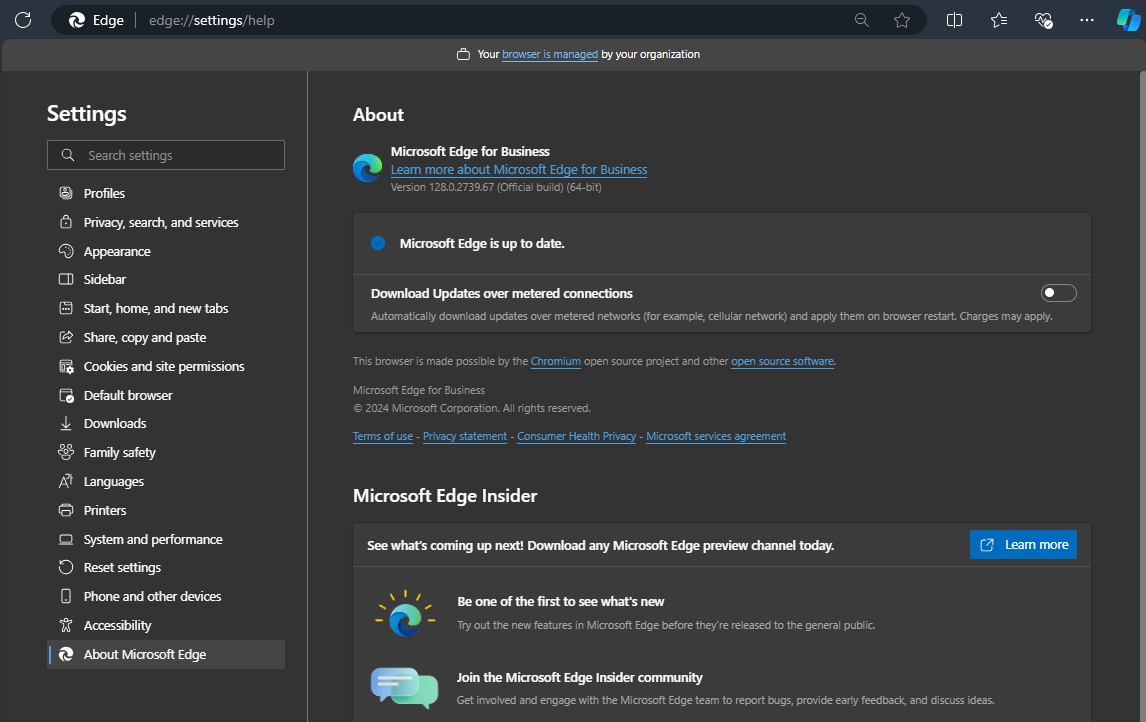
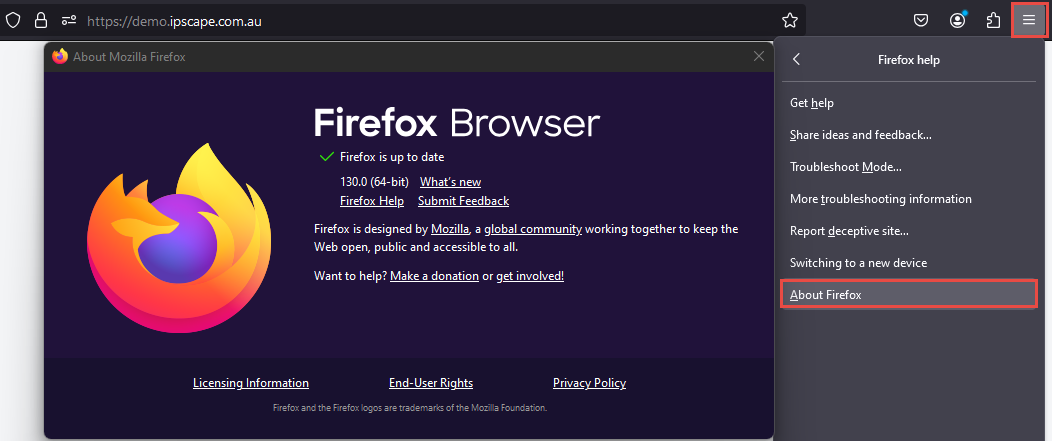
To function properly and protect users from browser vulnerabilities, ipSCAPE needs to run on the latest version of the browser. Normally updates happen in the background, updated automatically or managed by your organisation. This article will guide you on how to manually update all of the widely used and supported browsers for ipSCAPE.
Lost Voice Connection
If an agent loses voice connection while logged into the Agent Toolbar on a persistent connection a pop-up notification will appear briefly in the top centre of the toolbar and will also display a Connect Voice message next to the Call queue.
To reconnect the voice connection, click Connect Voice to open the connection dialog window which is presented when first logging in.

Auto Pause
The system will change the status to Paused with a Pause Reason of "Auto Pause" when ipSCAPE is unable to successfully allocate a call to an agent.
Example Scenario:
Agent connected on a Non-Persistent voice connection, in an available state when the system allocated an inbound call to the agent and then failed to answer the call within the “Agent Ring Timeout” period set in the Organisations settings of the Workspace.
Agent lost their voice connection and is unable to take any call
This commonly occurs when the agent is using a Web Based voice service like “Web Connect” or any type of Softphone and rarely happens on a Persistent voice connection.
If agent’s status is on Auto Pause, they would not be able to receive calls and should change their status immediately to Available.

